
Too many options. Too little room. Costs rise fast. This playbook gives a simple path so your island fits, works, and stays on budget.
Choose an island by purpose, space, and build details. Size it to your room. Keep aisles safe. Pick storage that matches how you cook. Plan lighting and power early. Use a clear budget map to avoid change orders.
You want steps you can act on now. Below, each section starts with a quick answer. Then we go deeper with rules, mini-checklists, and tables you can copy into your plan.
What is a kitchen island’s main purpose today?
Pick one core job: prep, seating, or serving. Support it with storage and power. Do not try to make one top do everything.
Double down on that job. If your island hosts guests, keep it dry and clean. If you cook a lot, put tools and trash close. Focus beats clutter.
How to make one job the hero
- Prep: sink, trash, boards, knives next to the edge you work from.
- Seating: safe overhang, outlets, drawers for plates and napkins.
- Serving: wide landing, tray slots, warming drawer if needed.
Deep dive
Start with your daily pattern. List the three most common tasks you do in the kitchen. If two or more involve water, your island likely needs a sink. If you host often, your island’s lead job is seating and serving. Keep hot work and sharp tools off the guest side. Make a small “pass-through” landing near the cooktop so hot pans move to the island safely. When you give the island a single identity, finishes feel easier too. A prep island can use a tougher top and a matte finish that hides prints. A seating island can use a warmer edge and rounded corners. Write your island’s job on the plan. Check every cabinet, outlet, and light against that job. Remove anything that does not help it.
Is a kitchen island right for my space?
An island fits when aisles stay wide and doors swing clean. If traffic squeezes, a peninsula or work table may serve you better.
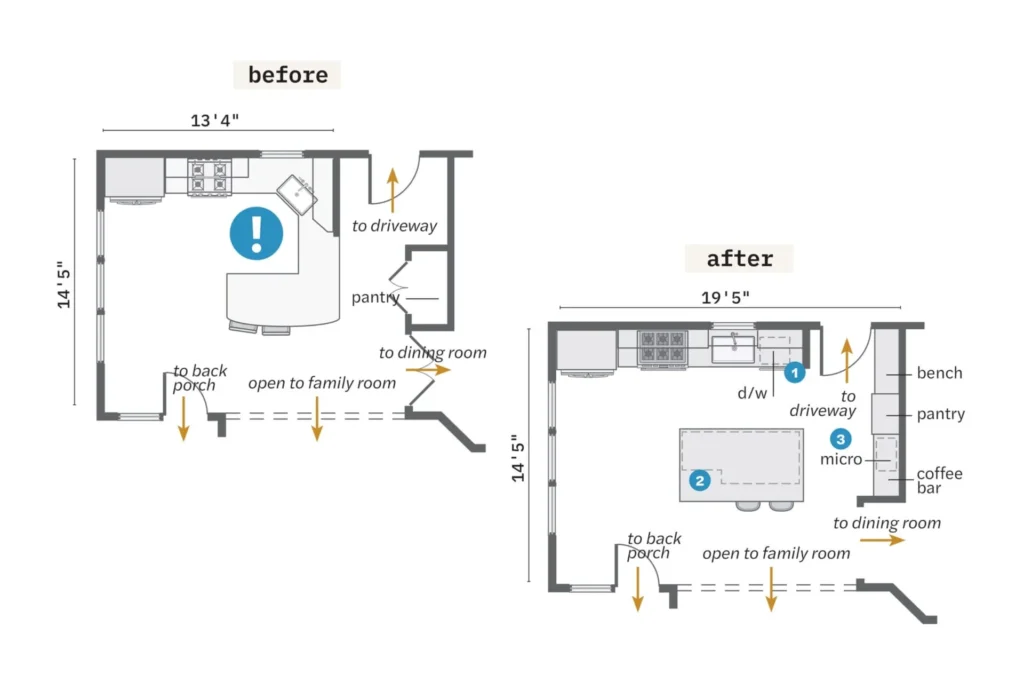
Measure first. Tape the footprint on the floor. Walk the path with chairs pulled out and doors open. Revise before you build.
Fit checklist
- Clear path from fridge to sink to cooktop.
- No dead-end corners at dishwashers or ovens.
- At least one straight “through route.”
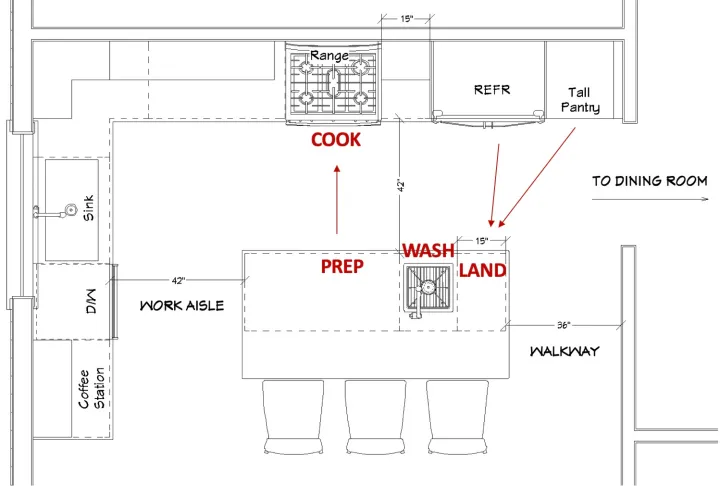
Deep dive
Begin with the room shell. Mark the fridge, sink, cooktop, ovens, tall pantry, and doorways. Draw paths between these points. Good paths do not cross active doors or chair backs. Now place a taped rectangle where the island might go. Pull out chairs to the full depth you plan to use. Open the dishwasher and oven. If a door meets a knee or hip, widen the aisle or shrink the island. Keep counter corners softened in tight rooms. When space is very tight, consider a narrow work table, a rolling island, or a peninsula. These options protect flow while still adding landing space. Remember lights and outlets too. If the ceiling layout cannot center pendants over your taped outline, adjust the island before rough wiring begins.
What size kitchen island do I need?
Match size to people, tasks, and room. A compact prep island may be 48″×24″. A seating island grows with chairs and legroom. Large rooms can hold 96″×42″ or more if aisles stay safe.
Seat width needs about 24″ per person. Leave 18–24″ landings beside sinks or cooktops. Keep lengths inside typical slab sizes to reduce seams.
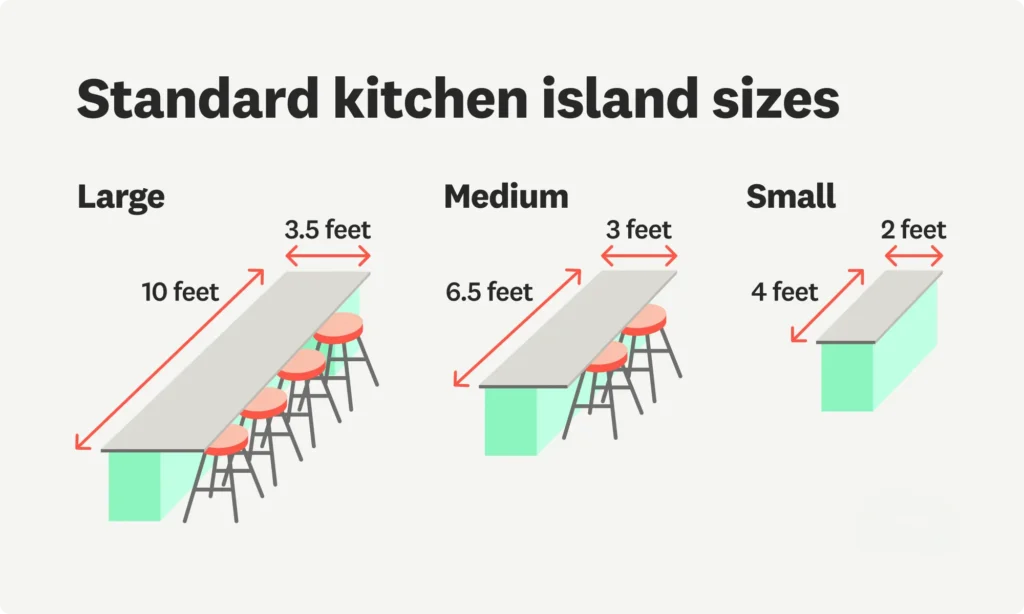
Sizing cues
| Use case | Typical top size | Notes |
| Compact prep | 48″×24″ | No seating; fast workflow |
| 3–4 seats + prep | 72″×36″ | Space for boards and plates |
| Large family hub | 96″×42″ | Check slab lengths and seams |
Deep dive
Start with people. How many sit daily? How many sit during a party? Space stools at roughly 24″ center-to-center, more for arms. Next, map zones on the top. You need landing areas near sinks and cooktops, plus a clear mixing zone at least 24″ wide. Add a tray slot and a pull-out trash under the closest edge. For long islands, plan rhythm: storage bays every 24″, a power point every 4–6 feet, and consistent overhang. Tall ceilings like longer islands and larger pendants; low ceilings prefer compact islands with slim lights. Finally, confirm stone sizes. Many slabs stop near 120″. Overshoot that and you add seams, cost, and risk. Keep the island inside a single slab when you can. If you must seam, center it or hide it under a cooktop.
How much aisle clearance around an island?
Plan work aisles at 42″ for one cook and 48″ for two. Near seating, aim for 54″ so stools slide out and people pass.
Tighter lanes look sleek on paper but feel cramped. Test with tape. Open every door. If a door hits a knee, widen the lane.
Aisle targets
| Location | Good | Better | Best (access) |
| Work aisle | 42″ | 48″ | 60″ |
| Seating aisle | 48″ | 54″ | 60″ |
| Ends of island | 36″ | 42″ | 48″ |
Deep dive
Map all moving parts. Dishwashers drop doors into aisles. Ovens need space to stand while pulling trays. Fridges need swing room plus a landing nearby. Add 3–6″ of “breathing room” beyond door edges for hands and hips. If two appliances face each other, increase to 54–60″. Watch corners too. Sharp corners at tight aisles bruise hips. Round them or clip them. In homes that need wheelchair access, target 60″ through-routes and 48″ side aisles. When space is short, reduce island depth before shrinking every aisle. A narrow island can still work well if the lanes feel open.
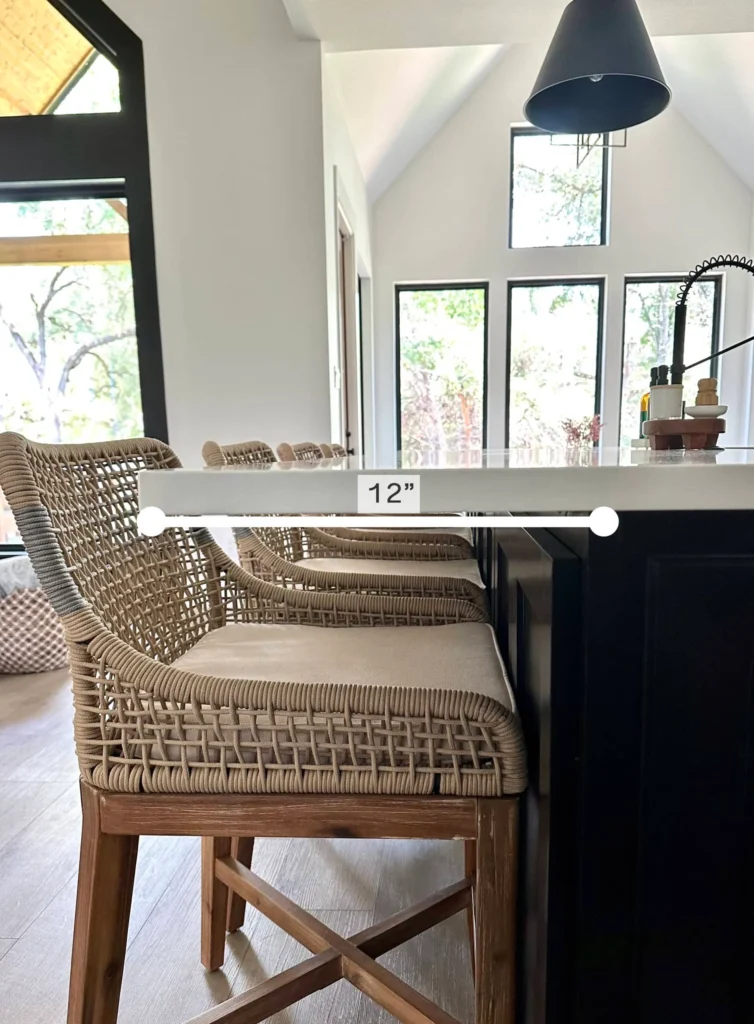
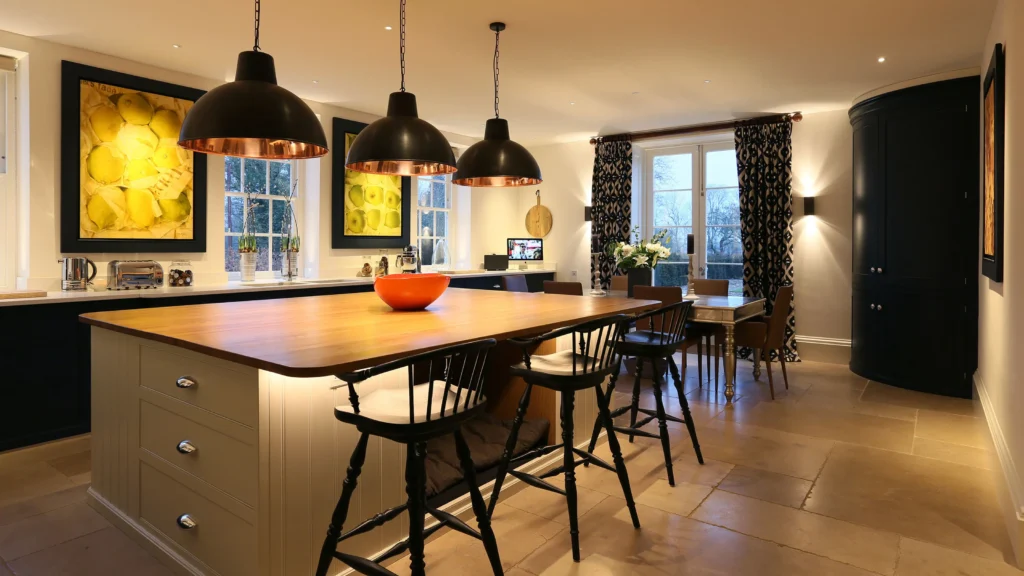
What is the ideal island overhang for seating?
Most people sit well with a 12–16″ overhang. Deeper overhangs need hidden steel or brackets. Shallow bars feel cramped and push knees against panels.
Pick stool height first. Aim for 10–12″ from seat top to counter underside. Then set the overhang and order supports that match your top’s weight.
Overhang and support
| Counter | Overhang sweet spot | Support note |
| Stone (3 cm) | 12–15″ | Hidden steel works well |
| Stone (2 cm) | 10–12″ | Add build-up + brackets |
| Wood/composite | 12–16″ | Follow maker span limits |
Deep dive
Comfort comes from three numbers: overhang depth, seat spacing, and knee space. Keep seat spacing near 24″ centers. Leave at least 15″ of knee room under the top. Round or ease corners at stool zones. Use a continuous steel plate or slim hidden brackets for clean looks. Space brackets so every seat has support. If your island carries a sink or cooktop, keep those holes away from overhangs and from bracket locations. Plan a wipe edge: a small radius softens touch and saves sleeves. If you host kids often, protect the underside with a scuff-resistant panel and mount bag hooks where feet will not hit them.
Should my island include a sink or cooktop?
Add water or heat only if it makes work faster. A prep sink helps chopping and cleanup. A cooktop on the island needs a landing, clear sightlines, and strong ventilation.
If the island is small, keep it dry. Put the cooktop on a wall with a quiet hood. Use the island for mixing and plating. Fewer holes mean more storage.

Choose by task
| You do this most | Best choice | Why |
| Chop and mix | Prep sink | Short trips, easy cleanup |
| Fry and sauté | Wall cooktop | Safer venting, less splatter |
| Bake and plate | Dry island | Big landing for trays |
Deep dive
List the tools you reach for every day. Knives, boards, bowls, and trash want to live at a prep sink. Place dishwasher and compost beside it. If you lean on frying or searing, think twice about an island cooktop. Grease and steam move toward seats and living rooms. If you still want a cooktop in the island, give it 18–24″ landings both sides, a quiet but strong vent, and a heat-resistant splash zone behind seats. Keep controls away from stool knees. For homes with kids, a dry island is safer. Move hot work to a wall where a hood can do its job.
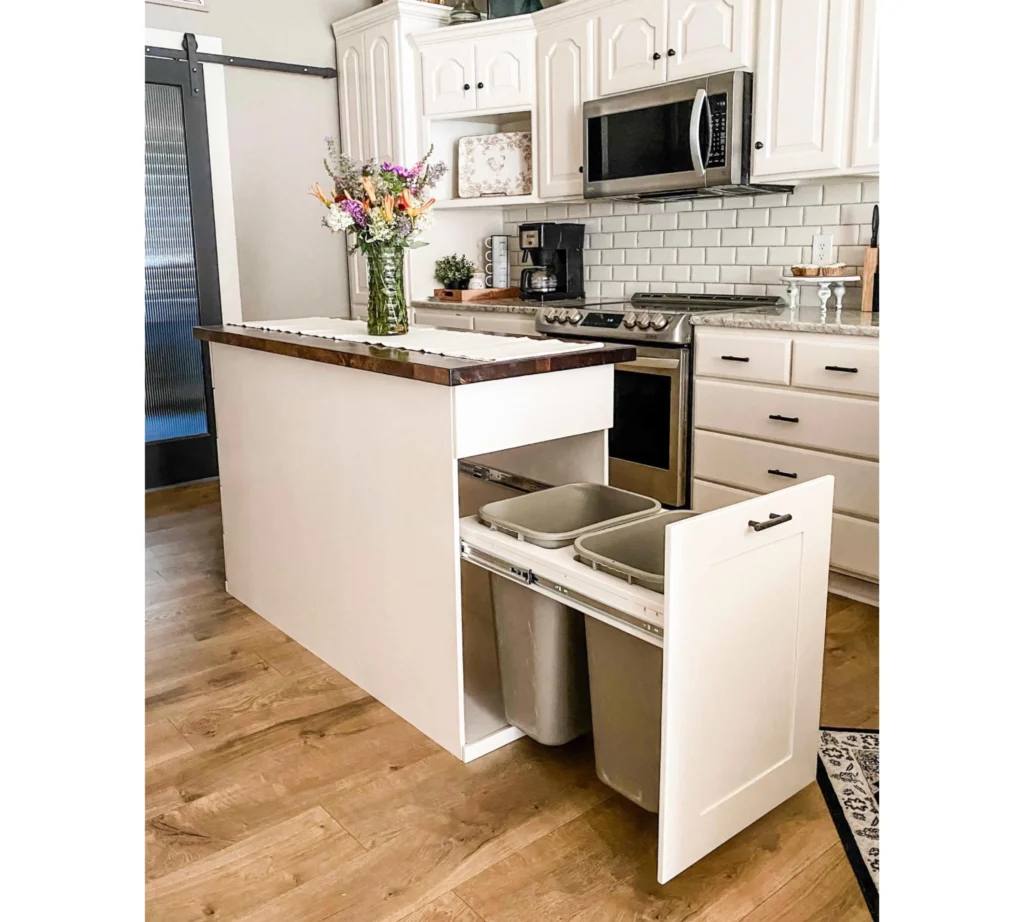
What storage should a kitchen island include?
Store tools where you use them. Drawers near the prep edge hold knives and boards. Deep drawers hold pots. Doors fit tall bins or mixers. Add a tray slot for baking sheets.
Make zones. One side for cooking, one for serving. Guests can grab plates without walking into the cook’s path.
Storage map
| Item | Best spot | Container |
| Knives/boards | Prep edge | Shallow drawers |
| Pots/pans | Near cooktop side | Deep drawers |
| Trash/compost | Next to sink | Pull-out |
| Trays/sheets | Vertical slot | Dividers |
| Plates/napkins | Seating side | Shallow drawers |
| Small appliances | Corner or low | Doors + pull-out shelf |
Deep dive
Think in reach zones. Keep heavy pans between knee and waist so you lift safely. Use full-extension slides so nothing hides at the back. If the island hosts a sink, give it a two-bin pull-out for trash and recycling. On the seating side, use shallow drawers for flatware, napkins, and chargers. Add a lockable drawer if you store bar tools. Keep cleaning kits in a low, wide drawer: towels, sprays, and a small brush for crumbs. For bakers, a 30″ wide drawer with adjustable dividers holds rolling pins and scales. For tech, add a power drawer with USB-C outlets and a cable pass-through. Label inside the box. After deep cleans, everything returns to the right bay.
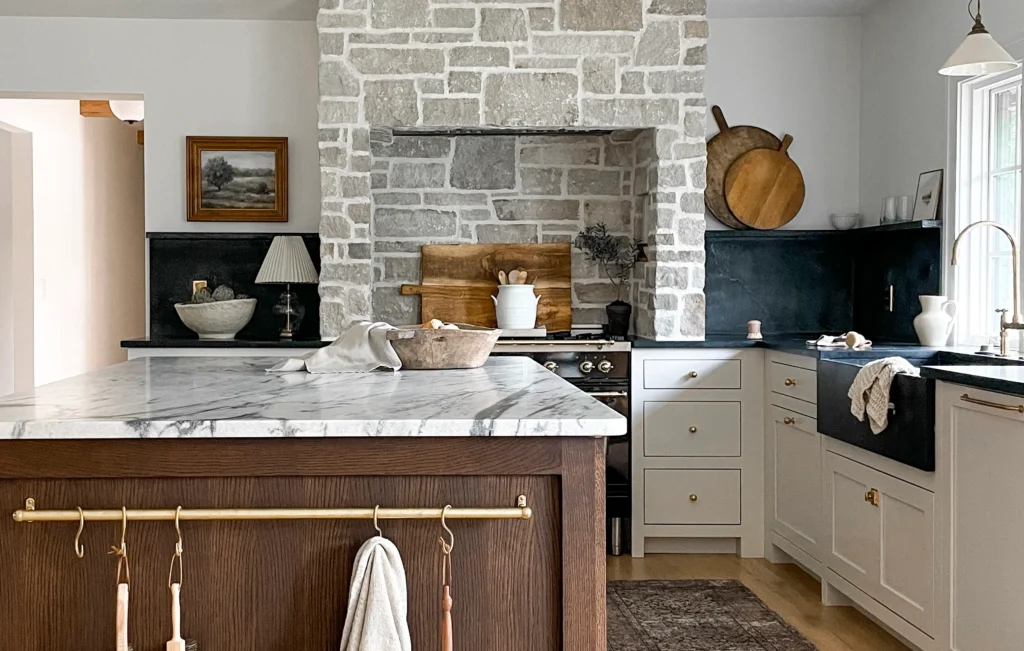
Should my island match or contrast the cabinets?
Both work. Matching reads calm and simple. Contrast makes the island a focal point. Keep one element the same—hardware finish or counter color—so the room still feels like one kit.
Choose contrast when the island faces living areas. Choose matching when the room already has many finishes.
Contrast playbook
- Change color, keep sheen.
- Keep counters the same on all runs.
- Repeat the island color in stools or a shelf.
Deep dive
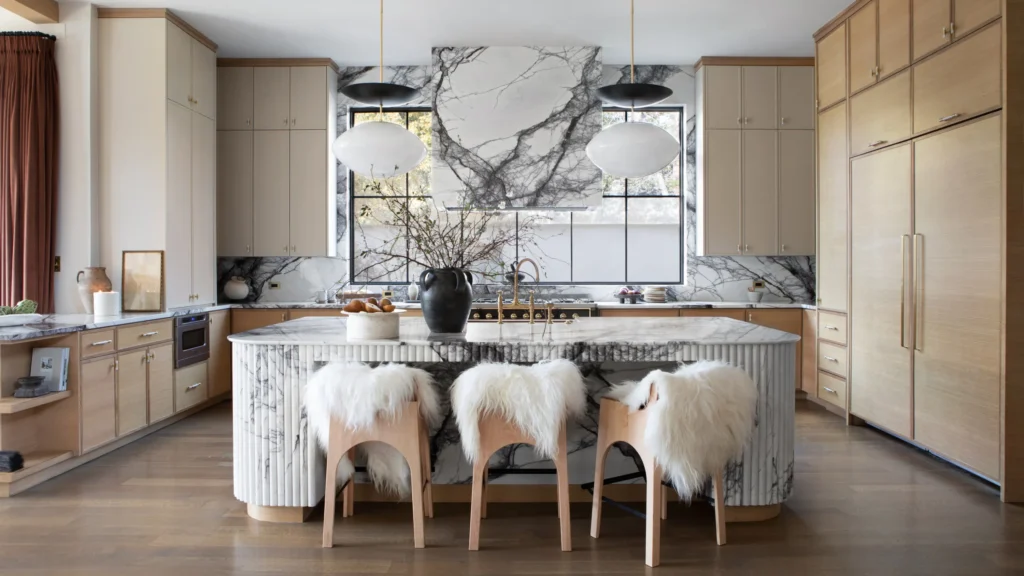
Use tone to control contrast. A soft shift—charcoal against black, cream against white—feels rich without noise. Strong color works best when the rest of the room is quiet. If you switch colors, repeat the island hue at least twice: in stools, a rug stripe, or open shelves. Use the same metal finish across room hardware to tie parts together. Keep panel details consistent. A slab island with a shaker perimeter can look like a mismatch. If you want variety, add texture instead of new colors: fluting on end panels, gentle reeding on posts, or a plinth detail that casts a shadow. Light the island color with warm pendants so it reads true at night.
Which countertop material is most durable for islands?
Pick by task and care level. Stone and sintered slabs handle heat and cuts. Composites resist stains. Wood adds warmth for seating but needs care near water.
Use a hard, stain-resistant top on prep areas. Use a forgiving, warm surface on the seating bar. Mixed materials save cost and set zones.
Quick compare
| Material | Strengths | Watch-outs | Best use |
| Quartzite/granite | Heat, scratch, natural | Seal as needed | Heavy prep |
| Sintered/porcelain | Stain, heat, thin edges | Brittle corners | Sleek modern |
| Engineered quartz | Stain, easy care | Heat caution | All-purpose |
| Wood | Warm, soft on glass | Finish upkeep | Seating, bakery zone |
Deep dive
Touch samples in bright and dim light. Matte and leathered finishes hide prints and soften glare. Polished wipes fast in busy homes. Check edge options; a square or small-radius edge feels current and safer for kids than sharp miters. If you plan deep seating, confirm hidden steel or plates with your fabricator. Keep seams away from overhangs and sinks. Ask for a small offcut during fabrication. That piece becomes a testing tile for cleaners, hot pots, and color matches if repairs are ever needed.
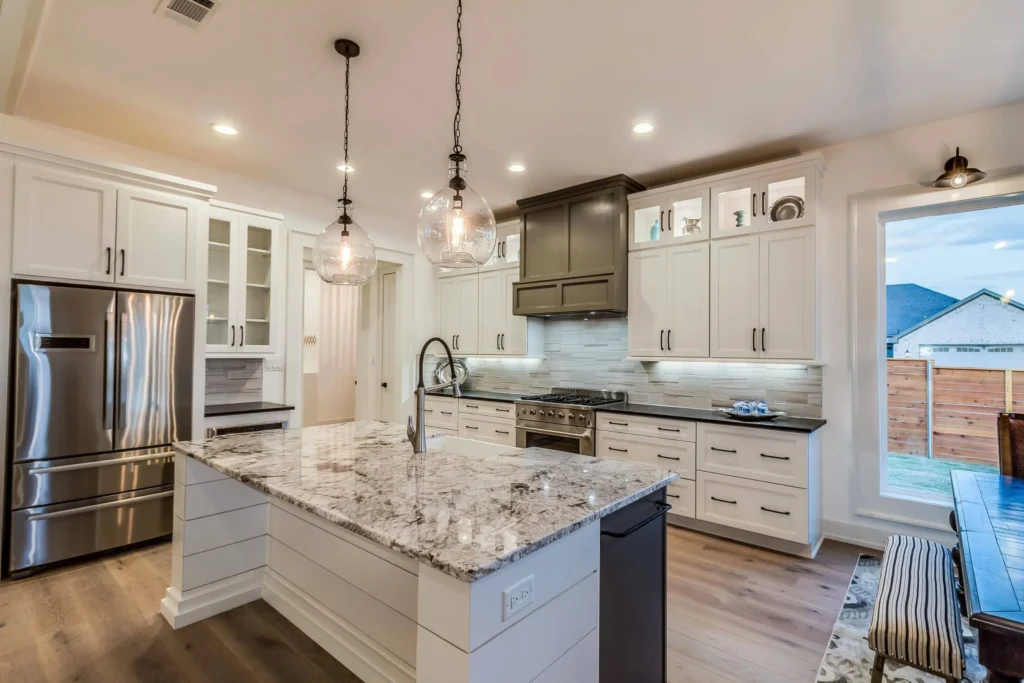
How should I light a kitchen island properly?
Layer light. Use bright task light on prep. Use warm, dimmable pendants over seats. Fill the room with even ceiling light. Add under-cabinet strips so faces and walls read clean.
Align pendants to the island top, not room center. Keep sightlines clear. Size shades to the island length and seat count.
Simple lighting map
| Zone | Fixture | Goal |
| Prep edge | Bright pendants or track | Shadow-free cutting |
| Seating edge | Warm pendants | Cozy talk, low glare |
| Perimeter | Under-cabinet strips | Even counters |
| Ceiling | Recessed cans | Smooth fill light |
Deep dive
Put prep and seating on separate dimmers. Pendants usually hang 30–36″ above the top. Keep the bottom rim above eye level when seated. For long islands, center each pendant over a seat pair. If you skip pendants, use a low-glare linear bar with good diffusion. Choose bulbs around neutral white for prep and slightly warmer for seating. Test finishes under your actual lights; some stones look green under cool LEDs. Plan outlet strips in island panels to charge devices without mess on the top.
How do I budget a new kitchen island?
Price the system, not only the top. Add cabinets, panels, supports, outlets, plumbing, lighting, and finish work. Keep edges simple. Use standard boxes and stock sizes where they fit.
Ask for a line-item quote. Compare apples to apples. Plan power and lights before fabrication. Small changes late can cost more than a thicker slab early.
Budget planner (copy this)
| Category | Good | Better | Notes |
| Cabinets | Stock boxes | Semi-custom | Keep shapes simple |
| Countertop | 3 cm stone | Mixed materials | Miter only if needed |
| Plumbing | None or 1 sink | 1 sink + disposer | Add only for real gains |
| Electrical | 2 outlets + pendants | Extra task lights | Group circuits on dimmers |
| Seating | 12–16″ overhang | Hidden steel | Fewer stools = more room |
Deep dive
Decide early on water and heat. These two choices drive most of the budget and layout. If you skip them, you save on plumbing, venting, and cutouts. Order all hardware at once: pulls, outlets, brackets, lights. Matching finishes reduce visual noise and change orders. Pad the budget for delivery and stone handling. Long tops need more labor and risk allowances. If the island sits over radiant floors, tell the team before drilling for supports. Plan a timeline: measure, rough, template, fabricate, install, punch list. A clear plan prevents idle days and rushed fixes.
Conclusion
Pick one job for the island. Size lanes first. Choose storage and lights to match tasks. Budget the whole system. Done right, the island works hard and looks easy.
FAQ
How much space should be between an island and counters?
Plan 42 inches for one cook, 48 for two. Near seating, aim 54 so stools slide and people pass. Widen for door swings and accessibility needs.
What is the standard height of a kitchen island?
Most islands are 36 inches high, matching counters for prep. Split-level designs use 36 and 42 inches when you want bar seating or visual separation.
How deep should an island be for comfortable seating?
Allow a 12–16 inch overhang and about 10–12 inches from seat top to counter underside. Deeper overhangs need hidden steel or brackets for safety.
How many pendant lights should hang over an island?
Size and spacing matter more than counts. A common rule is one pendant about every two feet of island length, adjusted for shade diameter and sightlines.
Are kitchen islands going out of style in 2025?
No. Islands stay useful and popular. Designers focus on proportion, clear function, layered lighting, and work-table alternatives in tight rooms.
What is a good size for a small island?
Compact prep islands can start near 48×24 inches if aisles remain wide. If clearances fall short, choose a narrow work table or a peninsula.
How far apart should stools be spaced at an island?
Plan roughly 24 inches per seat, more for armchairs or larger stools. Keep at least 15 inches of knee space and align stools with pendant centers.
Should my island include a sink or cooktop?
Add water or heat only if it speeds work. A prep sink helps chopping and cleanup. Small islands work better dry with generous landing space and storage.