Your remodel stalls at the cabinets. The room feels messy, the lines look off, and time runs out. You want a method that is clear, fast, and forgiving.
You can install cabinets with calm and order. Use a steady sequence: prep, lay out, hang uppers, set bases, join frames, and finish details. Work to reference lines, hit studs, and level each run. The result looks straight, tight, and clean.
We will walk step by step. Each section answers one common question, then gives simple actions you can follow today.
Are kitchen cabinets hard to install?
You may worry about weight, tools, and mistakes. The truth is simpler. You can do it if you plan well and move in order.
Most installs are “moderate” difficulty. The work is not complex, but it is exact. You measure, mark, and check often. You also move slow and steady. A clear plan, a helper, and simple jigs make the job far easier than it looks.
What “hard” really means
Scope and sequence
Cabinet work is a string of small tasks. None is hard alone. The risk comes from rushing the order. Set layout lines first. Hang uppers before bases. Tie frames, then fix doors.
Weight and control
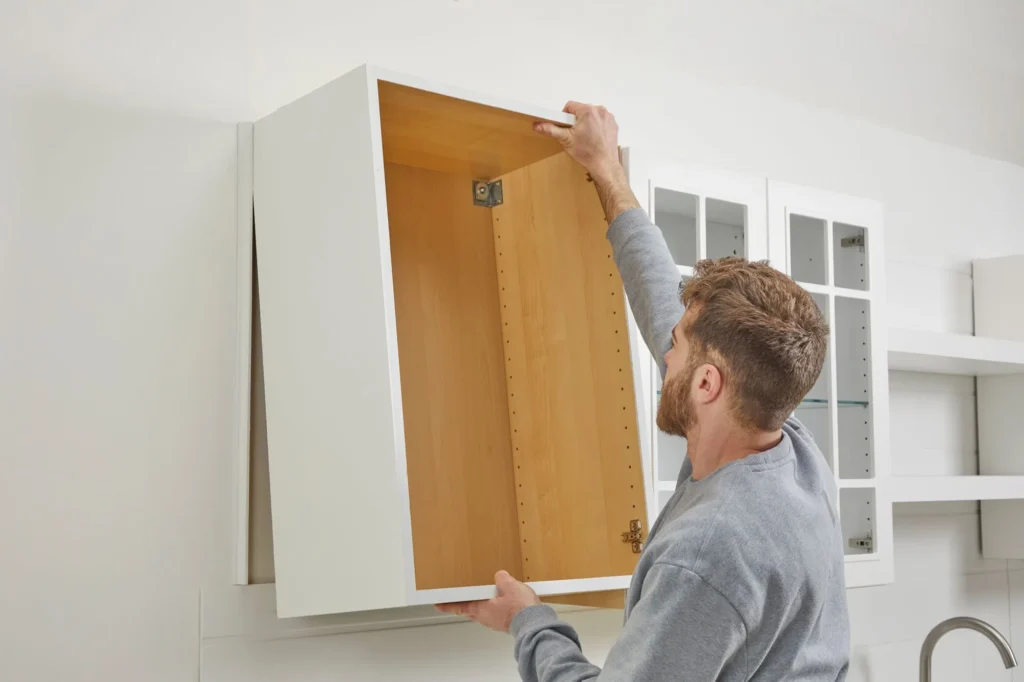
Cabinets feel heavy when you fight gravity. Use a ledger board for uppers and support blocks for bases. Remove doors and shelves to cut weight. Work at a steady pace with two people.
Tolerance and fix options
Walls are rarely flat or plumb. That is normal. Shims, fillers, scribes, and trim strip out small errors. Learn these simple fixes and the job feels manageable.
Reality check table
| Concern | What helps most | Result |
| Heavy boxes | Remove doors; use ledger | Safe, controlled lifts |
| Crooked walls | Shims, scribe fillers | Tight, even reveals |
| Bad measurements | Reference lines, re-checks | Fewer re-dos |
What tools do I need to install?
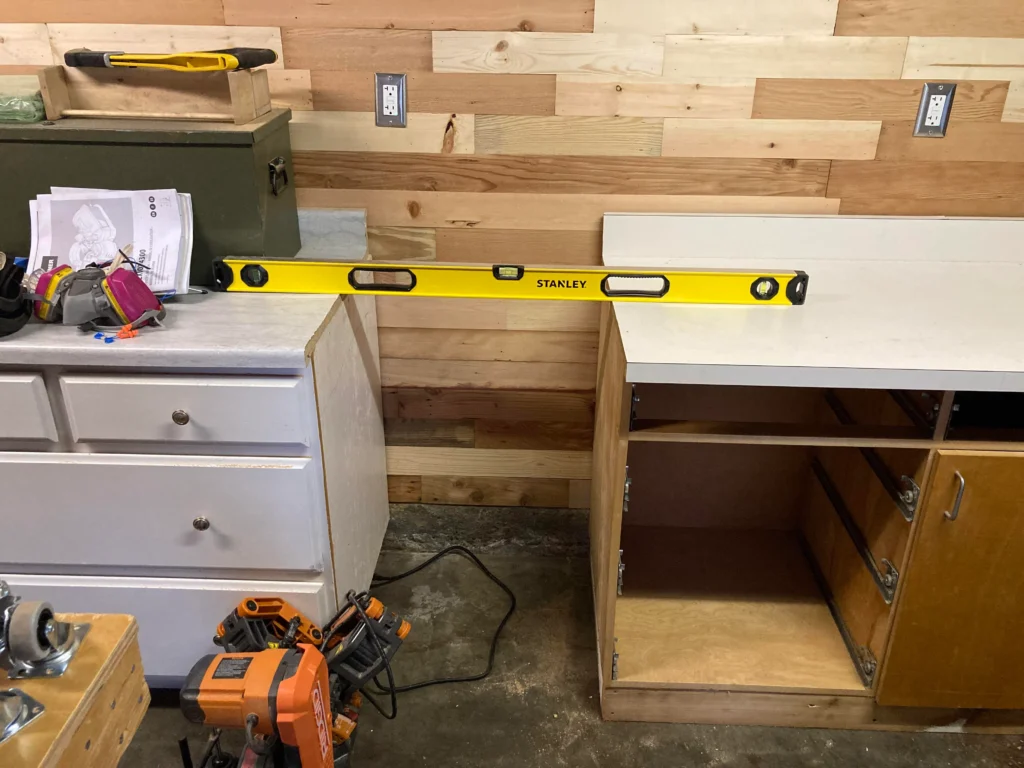
A long level, a stud finder, clamps, shims, and cabinet screws do most of the work. A drill/driver with bits, a tape, and a pencil do the rest.
Build a simple kit before you start. Keep it lean. Borrow or rent the few things you do not own. Put all fasteners and shims in a small tool tote so you do not hunt for parts while holding a box in the air.
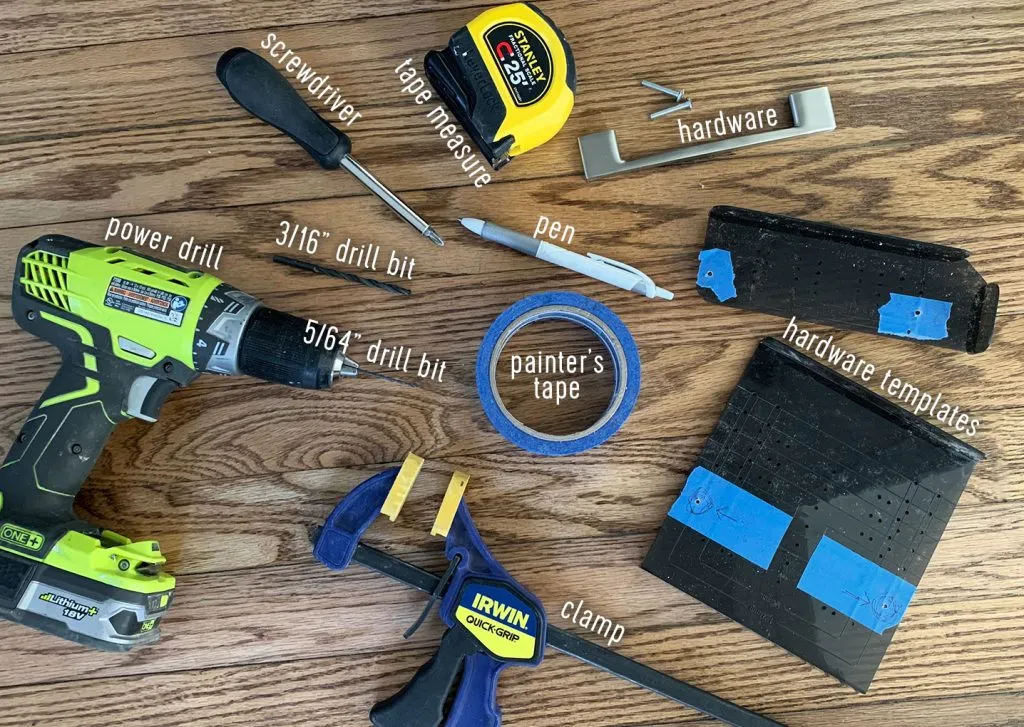
Core tools and simple swaps
Must-haves
You need a 4-ft level, tape measure, stud finder, drill/driver, countersink bit, clamps, pry bar, wood shims, and cabinet screws (not drywall screws).
Helpful, not required
Laser level, cabinet jack, right-angle drill, and a pocket hole jig save time. You can still finish the job without them.
Make-shift aids
A straight 1×3 doubles as a ledger. Scrap plywood works as spacers and temporary feet. Cardboard protects floors and doors from scuffs.
Tool and substitute table
| Tool | Purpose | Low-cost substitute |
| Laser level | Fast layout | Long spirit level + patience |
| Cabinet jack | Lift uppers | Ledger board + helper |
| Scribe tool | Trace wall curve | Compass or pencil on block |
| Clamps (F/pipe) | Join frames | Ratchet straps in a pinch |
Do I install upper or base cabinets first?
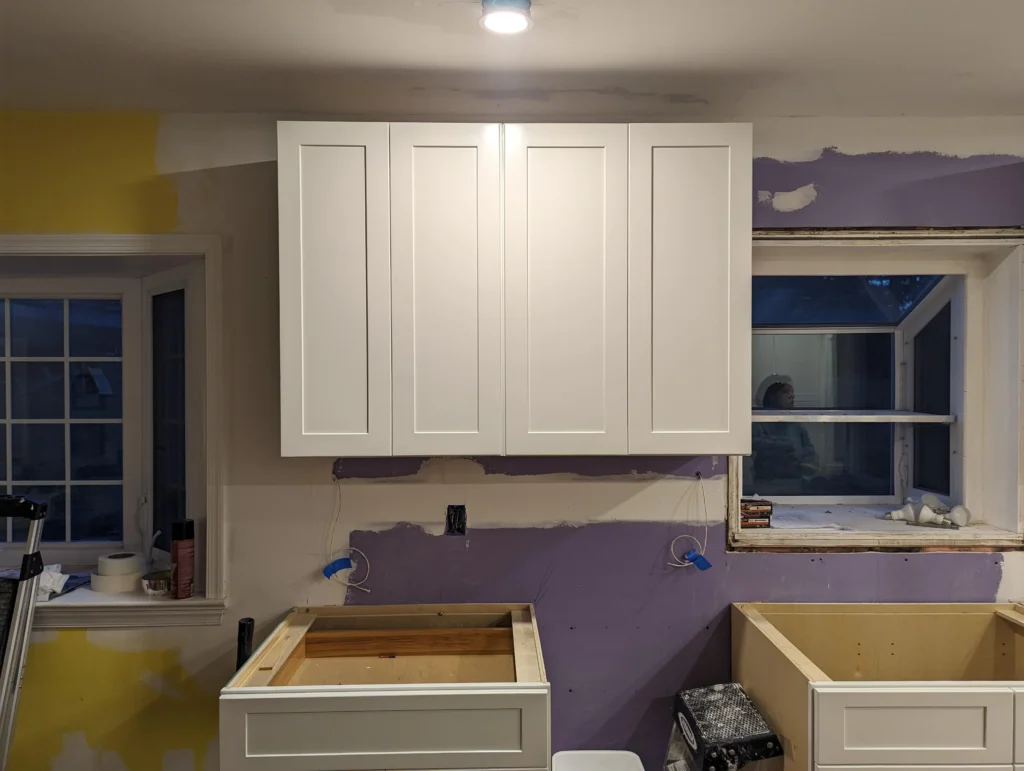
Hang uppers first. You gain space to stand near the wall. You avoid leaning over bases and scratching new tops. You also set a clean line for your backsplash height.
Uppers first is the safe, tidy order. Use a ledger to carry their weight while you aim screws at studs. After uppers are tight and aligned, place bases below and tune the gap to the line you set earlier.
Why this order works
Clear access
No bases in the way. You can move ladders and pivot boxes. Your drill fits better, and you can see stud marks.
Fixed reference
The bottom edge of uppers defines the 18-inch backsplash zone. Your base height can float a little to meet a level countertop later.
Fewer dings
You do not lean heavy boxes over new drawers and faces. The chance of chips and scratches drops a lot.
Order at a glance
| Step | Task | Tip |
| 1 | Hang uppers | Ledger + two clamps |
| 2 | Set bases | Start at high spot |
| 3 | Join faces | Clamp, pre-drill, screw |
How high should upper cabinets be?
Most kitchens set the bottom of uppers at 54 inches from the floor. That assumes 36 inches to the top of counters (34.5-inch base + 1.5-inch top) and an 18-inch backsplash gap.
Use 54 inches as a start, then adjust for your needs. Very tall users may lift uppers a bit. Short users may drop them slightly. Keep range hood and code clearances in mind.
Heights and clearances made simple
Standard math
Base box: 34.5 in. Counter: ~1.5 in. Backsplash: 18 in. Bottom of uppers: 54 in. That puts the top of typical 30-in uppers at 84 in.
When to change it
If your ceiling is low, choose shorter uppers or reduce the gap to 17 in. If you have tall ceilings, consider 36-in or 42-in uppers to reach higher.
Special zones
Keep safe clearances over ranges per your appliance guide. Plan for under-cabinet lights when marking the 54-in line.
Height guide
| Item | Common size |
| Base cabinet height (no top) | 34.5 in |
| Finished counter height | 36 in |
| Backsplash space | 18 in |
| Bottom of uppers | 54 in |
How do I find wall studs quickly?
Use a stud finder to confirm location, then verify with clues. Outlets often sit on one side of a stud. Baseboards show nail dimples at studs. Measure 16 inches on center once you find the first one.
Studs matter. Cabinet screws must hit them. Mark each centerline with painter’s tape from floor to ceiling so you never lose the target while lifting boxes.

Methods that stack the odds
Tools plus logic
Use the stud finder in both directions. Then check for nails in trim, measure typical spacing, and drill a small test hole where a filler will cover it.
Keep marks visible
Draw vertical lines and write the distance from a nearby corner. If marks get covered by ledgers or boxes, re-mark them.
Avoid wiring and pipes
Scan for live wires. Avoid drilling near outlets. In wet walls, use care and shallow pilot holes before long screws.
Stud-finding comparison
| Method | Speed | Confidence |
| Electronic finder | Fast | High |
| Nail dimple reading | Medium | Medium |
| Probe hole (hidden spot) | Slow | Very high |
What screws should I use for cabinets?
Use cabinet screws or structural wood screws with deep threads and flat or washer heads. Typical length is 2.5 to 3 inches for going through the cabinet back and into studs.
Do not use drywall screws. They are brittle and the heads snap. Pre-drill to prevent splitting. Use finish washers for face-frame joins so heads do not crush the wood.

Fasteners without regrets
Into studs
Choose a screw that leaves at least 1.25 inches in the stud after passing the cabinet back. Use a washer or pan head for better bearing.
Frame to frame
Clamp faces flush. Pre-drill a shank hole in the first frame and a pilot in the second. Use trim-head or washer-head screws and stop as soon as faces kiss.
Hinges and slides
Use the hardware screws supplied with the hinges and slides. Do not over-tighten. Stripped holes can be fixed with wood glue and a sliver of hardwood.
Screw selection table
| Task | Size | Head style | Note |
| Box to stud | #8–#10 × 2.5–3 in | Washer/Pan | Pre-drill, hit center |
| Face-frame join | #8 × 1.25–1.75 in | Trim/Washer | Clamp tight first |
| Ledger to studs | #10 × 2.5–3 in | Washer | Remove after uppers hang |
How do I deal with uneven floors?
Start bases at the highest point in the room. Shim under cabinets to bring all boxes to level with that point. Never cut the cabinet bottoms; hide level changes in the toe-kick.
Uneven floors are normal. The fix is simple: find the high spot, set a level line, and work to that line. Then fit a toe-kick or base molding to close neat gaps.
A clean plan for bad floors
Find the high spot
Lay a level or laser around the room. Mark a reference line for the top of bases (usually 34.5 in from the high spot).
Set the first run
Place the corner or end cabinet at the high spot. Shim under other boxes until the top edges hit your line.
Hide, do not hack
Do not shave doors, faces, or cabinet bottoms. Use toe-kicks and scribed base trim to mask floor waves.
Shim points and checks
| Where to shim | Why | Check |
| Front corners | Prevent rocking | Doors stay square |
| Mid rails | Support weight | No sag under loads |
| Back corners | Maintain level | Counters sit flat |
Do I start with the corner cabinet?
Yes, in most layouts. The corner or a fixed end cabinet becomes your anchor. It defines plumb, level, and the face line for the rest.
Starting at the anchor keeps reveals and gaps even. You can then move along the wall, one box at a time, clamping and joining as you go. Adjust small errors before they spread.
Why corners make life easier
Two directions, one reference
A corner controls both adjoining runs. If the corner is right, the rest likes to fall in line.
Space for adjustments
Set the anchor near level and plumb, then “tune” the next cabinet to it. Small shims are easier than trying to bend a long run later.
Fewer compounding errors
Errors grow with distance. Fix them early at the anchor. Use a straightedge across faces to keep a single plane.
Anchor cabinet checklist
| Item | Target |
| Level front-to-back | Bubble centered |
| Level left-to-right | Bubble centered |
| Face plumb | Tight to straightedge |
How do I shim cabinets for perfect alignment?
Shim under bases for level. Shim behind faces for plumb. Use pairs of shims from opposite sides so the load sits flat. Trim flush with a sharp knife.
Move slow. Check each cabinet after you add a shim. Look at doors, gaps, and face alignment. The goal is one flat plane with even reveals, not a perfect wall.
Simple shim science
Use pairs
Slide two shims tip-to-tip to make a small, stable wedge. This resists crush and holds height over time.
Where to place them
Under front corners first, then back corners, then mid rails. Behind frames only when a wall bows; place near screws so force goes through the shim.
Verify constantly
After each adjustment, close doors and check lines. Use a long level and a straightedge across faces. Tighten screws only after the run is true.
Shim size and placement
| Location | Typical lift | Notes |
| Front corners | 1–6 mm | Stops rocking |
| Back corners | 1–8 mm | Fights wall dips |
| Behind face | As needed | Keep near fastener |
How do I scribe fillers to walls?
Cut fillers to match the wall’s curve so the gap closes tight. Mark with a scribe tool or a pencil taped to a small block. Cut to the line, sand, and test-fit.
Scribing turns bad walls into clean lines. You use this at tall pantry ends, at ceiling fillers, and where cabinets meet uneven tile. Work slow. You can always cut more; you cannot add wood back.
Scribe steps that work
Set the gap
Clamp the filler in place with a small, even gap from the wall (often 1/8–1/4 in). This gives the scribe room to ride.
Trace the wall
Run the scribe along the wall so the pencil copies its curve onto the filler. Keep it square and steady.
Cut and fit
Cut just outside the line with a jigsaw or block plane. Sand to the line. Test. Repeat small cuts until the seam looks tight.
Scribe checklist
| Step | Action | Tip |
| 1 | Clamp filler | Protect faces with pads |
| 2 | Trace curve | Keep tool square to filler |
| 3 | Cut, sand, test | Sneak up on perfect |
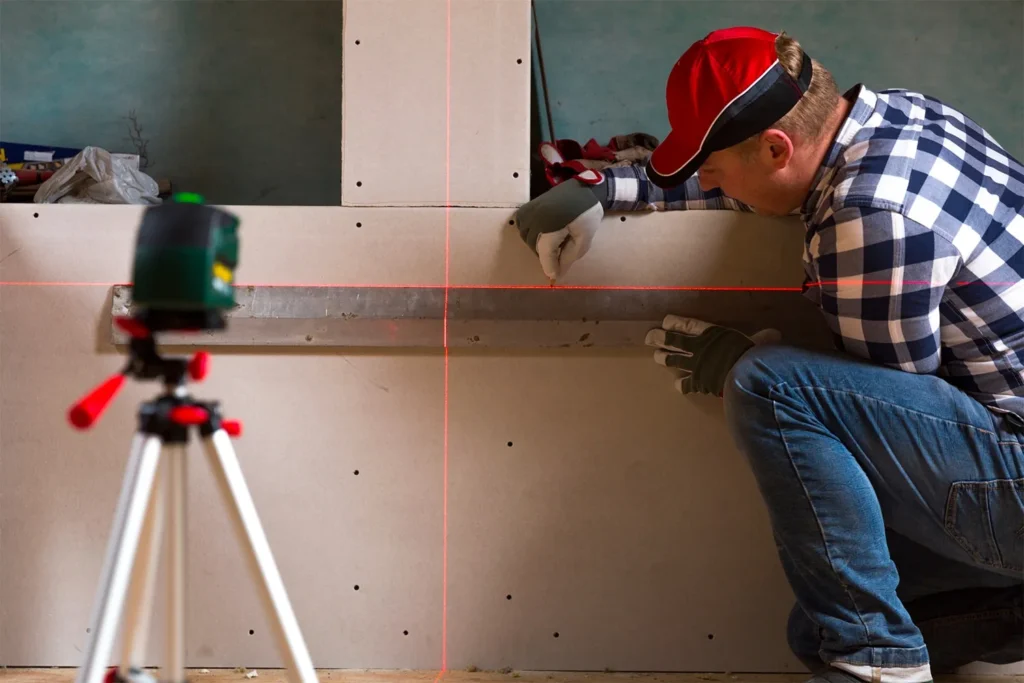
How do I mark level and plumb lines?
Good lines make the job calm. Use a laser or a 4-ft level to draw your 54-in upper line and your base top line. Drop plumb lines at each corner and at appliance gaps.
These marks do not move. They guide every shim, screw, and clamp. When in doubt, go back to the lines. If a box does not match them, adjust the box—not the line.
Layout that resists drift
Draw once, trust always
Snap or draw level lines where bases and uppers must land. Use painter’s tape to write notes like “DW gap” and stud centers.
Plumb at the ends
Drop lines floor to ceiling at run ends. You will see tilt fast and can correct it before you tie in more boxes.
Check against doors and windows
Use casing edges to sanity-check your lines. If something looks off, re-measure. The lines win; do not chase crooked trim.
Core layout marks
| Line | Purpose |
| 54-in line | Bottom of uppers |
| Base top line | Level tops for counters |
| Plumb drops | Check tilt at ends |
Conclusion
Plan, mark, hang, and tune. Use studs, lines, and shims. Move slow. Fix small errors early. Your cabinets will look straight, tight, and built by a pro.
FAQ
Do you install flooring before or after cabinets?
Most pros install cabinets first, then flooring. This avoids trapping floors under heavy boxes. Add finished shoe molding later to cover small gaps.
Can you hang cabinets on plaster or masonry walls?
Yes, with the right anchors. Use masonry screws, lead shields, or a ledger tied to solid backing. Pre-drill and avoid brittle plaster edges.
How much does cabinet installation typically cost?
Costs vary by region and layout. Many pay a few thousand for labor on a standard kitchen. Complex runs, tall pantries, and crown raise the price.
What is standard cabinet depth and height?
Base boxes are about 24 inches deep and 34.5 inches tall without tops. Wall boxes are about 12 inches deep and often 30 to 42 inches tall.
Do you need a permit to install kitchen cabinets?
Usually no, if you do not move plumbing, gas, or electrical. If you change walls or systems, check your local rules before you start.
Can you reuse old cabinet boxes and just add new doors?
Often yes, if boxes are square and solid. You can fit new doors, drawers, and fronts. Check for water damage, loose joints, and sag before you commit.
How far should cabinets be from the ceiling?
It depends on style and ceiling height. Many run them to the ceiling with a small trim. Others leave a gap to avoid complex scribing.
Do you glue cabinets to the wall?
No. Use screws into studs for structure. Glue can trap boxes and make future service hard. Use trim and scribe fillers to close gaps instead.