
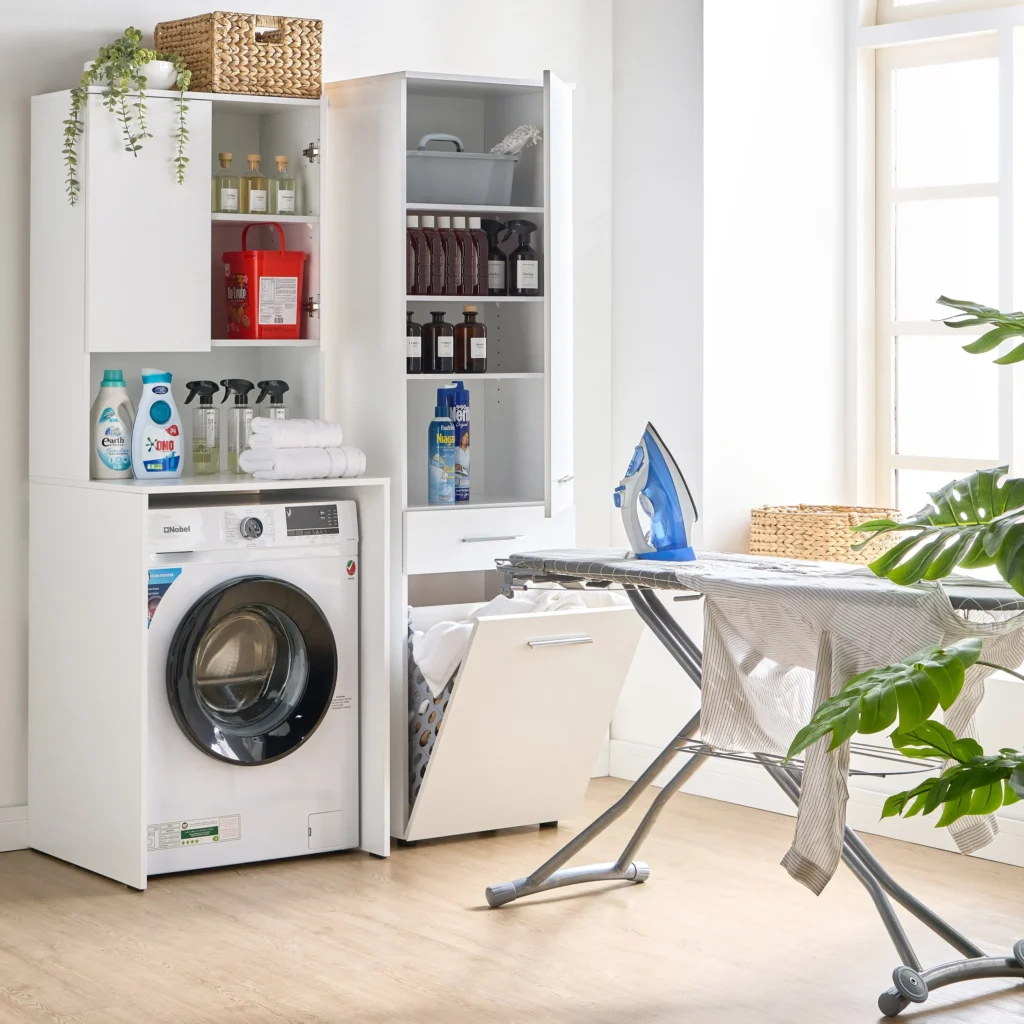
Running out of storage and patience? Clutter grows, surfaces shrink, and laundry piles win. Build a simple, strong cabinet wall. It will look custom, work daily, and clean up fast.
We are a one-stop building-materials partner based in Foshan, serving overseas projects. We supply kitchens, wardrobes, bathrooms, windows and doors, tiles, lighting, flooring, and wall panels. We support homeowners, renovation teams, designers, developers, and builders. We also help with interior and facade 3D design, whole-home style matching, export logistics, and after-sales support. The goal here is clear steps and steady results.
You can get a custom look with stock boxes. Plan the layout, prep the wall, join cabinets on the floor, and hang them level into studs. Add fillers and trim for a built-in finish. Keep clearances for machines and outlets, then choose a worktop that suits your routine.
Below you will find fast wins and deeper guidance. Read a section, try one small step, and your laundry zone will feel larger tonight.
Plan the Layout and Choose the Right Cabinets
Small rooms punish bad planning. Measure once, then confirm again. Pick boxes that fit height, depth, and door swing. Place the most used items at chest level to save reach.
A clean plan uses one rule: function first, finish second. Map machines, outlets, and plumbing. Decide if you want full-height storage, a counter for folding, or both. Stock boxes can look custom when sizes, fillers, and trim are chosen well. For background on built storage, see cabinetry.
Measure and decide
- Room scan: Measure wall width, ceiling height, and trim. Note door swings and any soffits.
- Machine footprint: Record width, depth with hoses, and top height with vibration clearance.
- Service points: Mark water valves, drain, vent, receptacles, and any access panels.
- Storage style: Wall cabinets only? Tall broom cabinet? Open shelves at the end?
Size and clearance quick guide
| Item | Typical range | Notes |
| Wall cabinet depth | 12–14 in (305–356 mm) | 12 in clears most doors and heads |
| Gap above washer/dryer | 18–24 in (457–610 mm) | Room for hoses and vibration |
| Counter height (over front-loads) | ~36 in (914 mm) | Matches kitchen ergonomics |
| Tall cabinet depth | 18–24 in (457–610 mm) | Fits brooms, vacuums, hampers |
Keep boxes off the corner by 1–2 in so doors clear. Use a narrow filler strip at walls to square reveals. Plan a single run of doors, not a puzzle of random widths. Your eye reads rhythm; even small widths repeated can look “custom.”
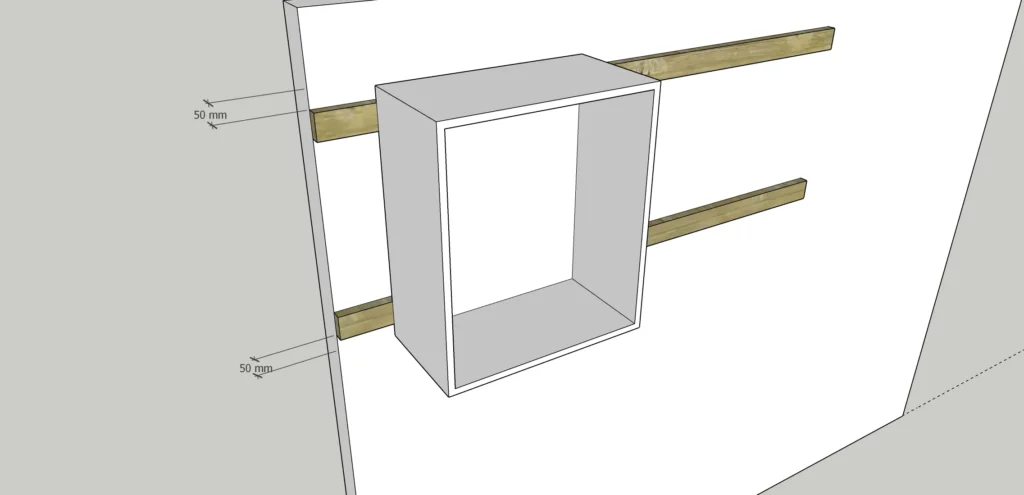
Prep the Wall, Find Studs, and Mark a True Line
Crooked walls make straight cabinets look wrong. Mark studs, strike a level line, and correct for humps with shims. Decide if you will use a temporary ledger to carry weight during install.
Studs are your structure. Find and mark them from floor to ceiling. Strike a level reference line for the bottom of wall cabinets. If the floor is out, trust the line, not the floor. A temporary ledger board can hold boxes while you fasten them, then comes off. For the framing member you are fastening into, see stud (woodworking).
Mark like a pro
- Stud finding: Confirm with a strong magnet and a stud finder. Mark both edges.
- Baseline: Use a 6-ft level or laser to draw the bottom line of wall cabinets.
- Ledger option: Screw a straight 2×4 to studs at the baseline to support boxes while you fasten.
- Shim points: Circle any drywall humps; you will need shims there for plumb faces.
Ledger or no ledger?
| Choice | Use when | Benefit | Watch-out |
| With ledger | Working solo or heavy boxes | Hands-free support and a dead-level shelf | Patch screw holes after removal |
| No ledger | Two helpers or cabinet jacks | Fewer wall holes | Juggling level, plumb, and weight at once |
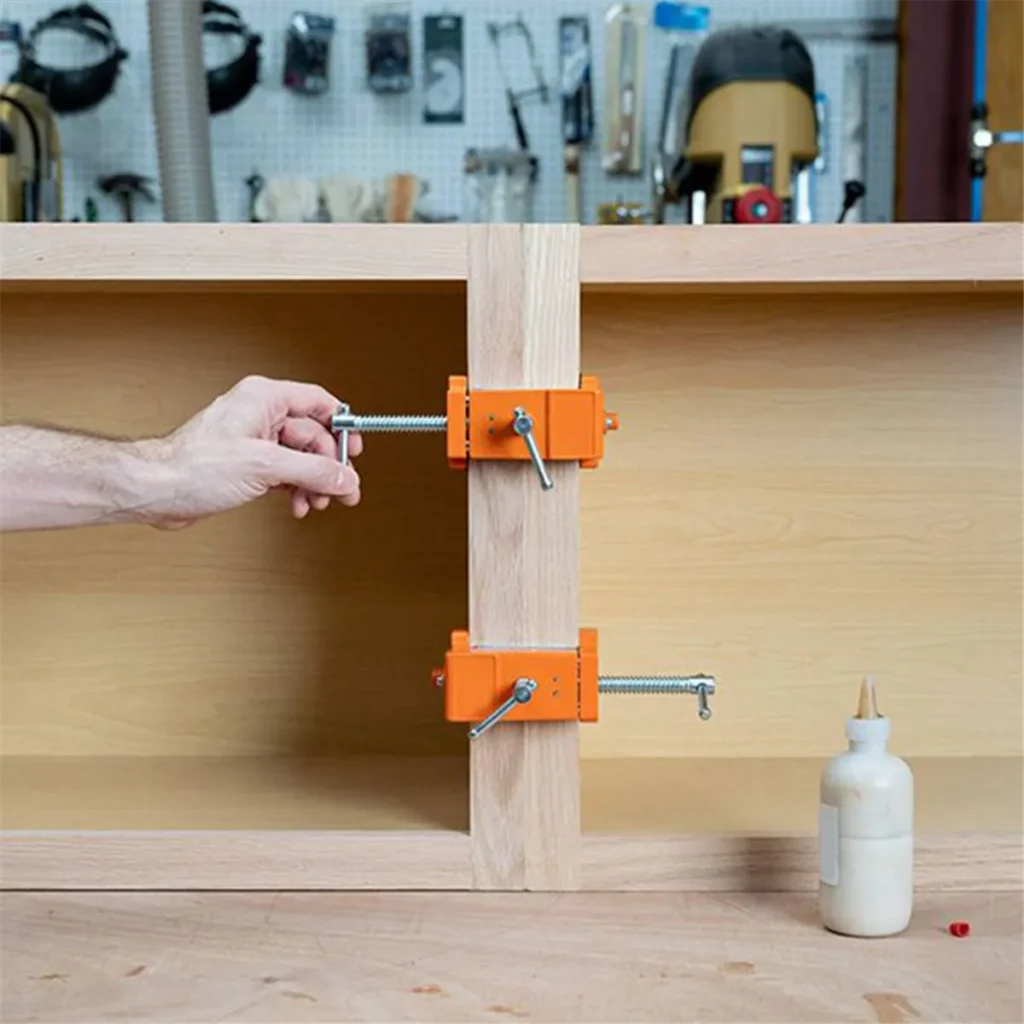
Assemble Boxes and Join Units on the Floor
Time is lost in the air. Join boxes while they rest on the floor or on a bench. Clamp, align faces, and screw boxes to each other before you lift.
Your run becomes one solid piece when boxes share fasteners. Gaps shrink, faces line up, and doors stay even. Pre-drill through side panels; use connector bolts or cabinet screws. Keep the fronts flush. Use cardboard to protect finished faces.
Floor-level SOP
- Dry fit: Arrange widths so doors align nicely and handles will not clash.
- Face alignment: Clamp fronts flush with a straight scrap as a bridge.
- Pilot and connect: Pre-drill, then use proper cabinet-to-cabinet connectors.
- Back rails: Confirm back rails will land on studs; adjust run left or right if needed.
Hardware and spacing table
| Task | Tool | Detail |
| Flush faces | Clamps + straightedge | Keep 1–2 mm proud on the better cabinet, then sand flush if needed |
| Pilot holes | 2–3 mm bit | Avoid splitting near edges; stop 10–15 mm short of face |
| Connectors | Cabinet screws/bolts | Place pairs high and low to prevent twist |
| Protect finish | Cardboard wrap | Tape edges where clamps grip |
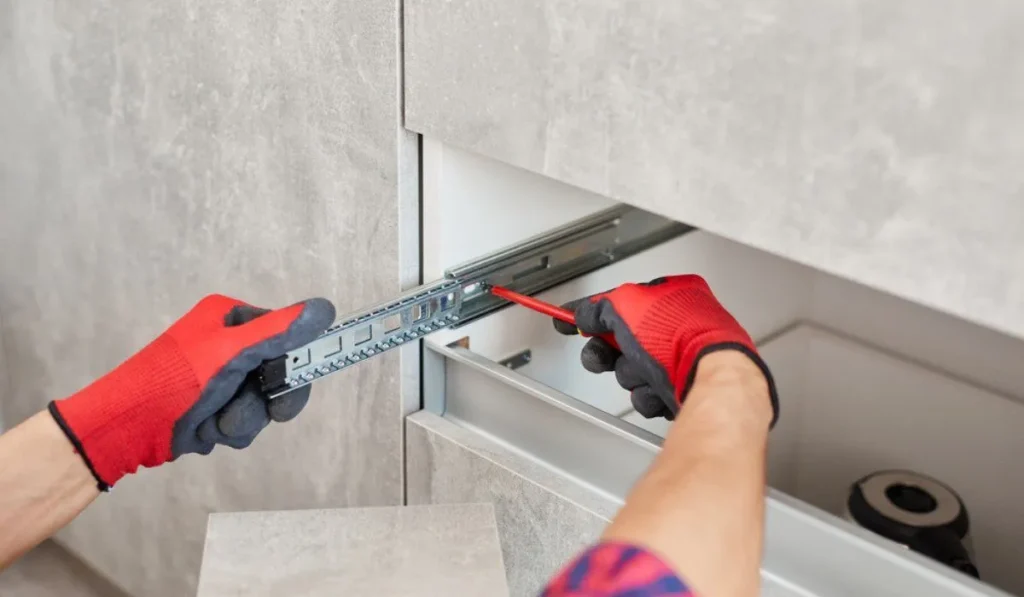
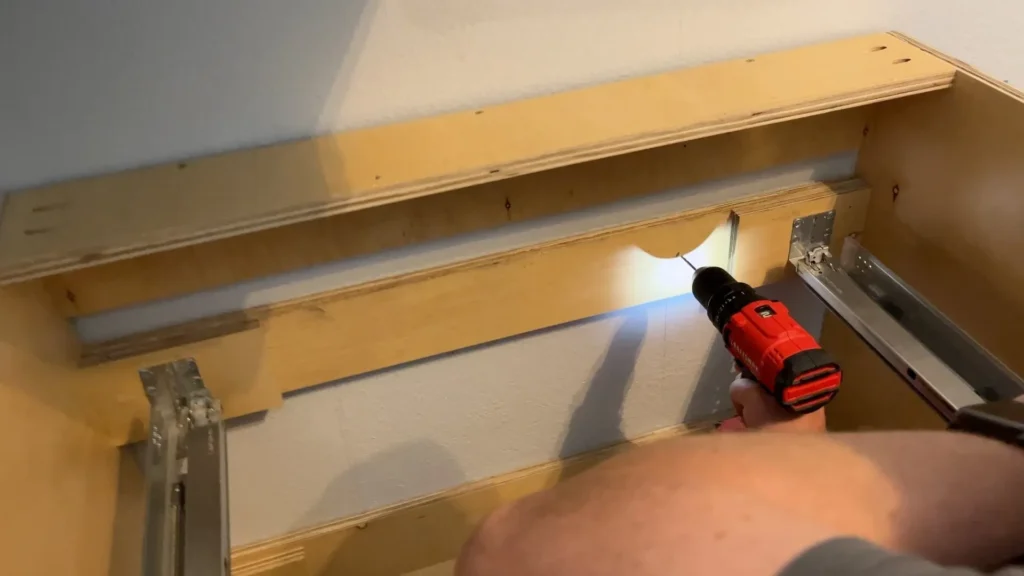
Hang Wall Cabinets Level, Plumb, and Solid
Strong attachment keeps doors straight and quiet. Lift onto the ledger (or jacks), tack one screw at a stud, level and plumb the box, then add full fasteners. Repeat for the joined run.
Use structural screws sized for stud depth. Drive through the cabinet’s back rail into studs. Check level across the run and plumb on each side. Shim behind the back rail where the wall bows. Do not crush drywall with over-torque.
Fastener basics
- Into wood studs: Use cabinet-rated screws with large heads. Typical length is 2½–3 in to penetrate stud by ~1½ in.
- Into masonry: Use sleeve anchors or Tapcon-type screws with proper pilot holes.
- Into steel studs: Use fine-thread self-drilling cabinet screws; consider adding plywood backer.
Checkpoints while hanging
| Step | What to verify | Why it matters |
| First screw | Height on line and stud hit | Sets the run; re-drill if off |
| Mid-run | Level across doors | Stops “smiles” and “frowns” in reveals |
| Each box | Plumb side to side | Doors self-close and overlay evenly |
| Final | All studs have fasteners | Long-term rigidity and quiet operation |
Finish Like Built-Ins: Fillers, Panels, and Crown
Details sell the “custom” story. Fill tight gaps with scribe strips. Add side panels to hide seams. Cap the top with simple crown. Caulk and touch up for shadow-free lines.
Fit a narrow filler at walls so doors can open fully. Use scribe edges to follow wavy walls. Add a thin end panel on exposed sides. For a finished top, run simple crown where ceiling allows. For trim that meets walls and ceiling, see crown molding.

Trim toolkit
- Filler strips: Rip to width, scribe, plane to fit, pre-finish edges.
- End panels: Apply with brads and adhesive; align grain with doors.
- Crown: Choose a low-profile shape for low ceilings. Cope corners if needed.
- Caulk: Paintable, small bead only, smooth with a damp finger.
Common trim choices
| Piece | When to use | Result |
| 1–2 in filler | Wall out of square; door needs swing | Clean reveal; no rub |
| ¼ in end panel | Exposed side faces entry | Furniture-like finish |
| Simple crown | Ceiling allows 1½–3 in | Built-in look; hides top gap |
| Scribe strip | Uneven wall or floor | Tight seam; fewer shadows |
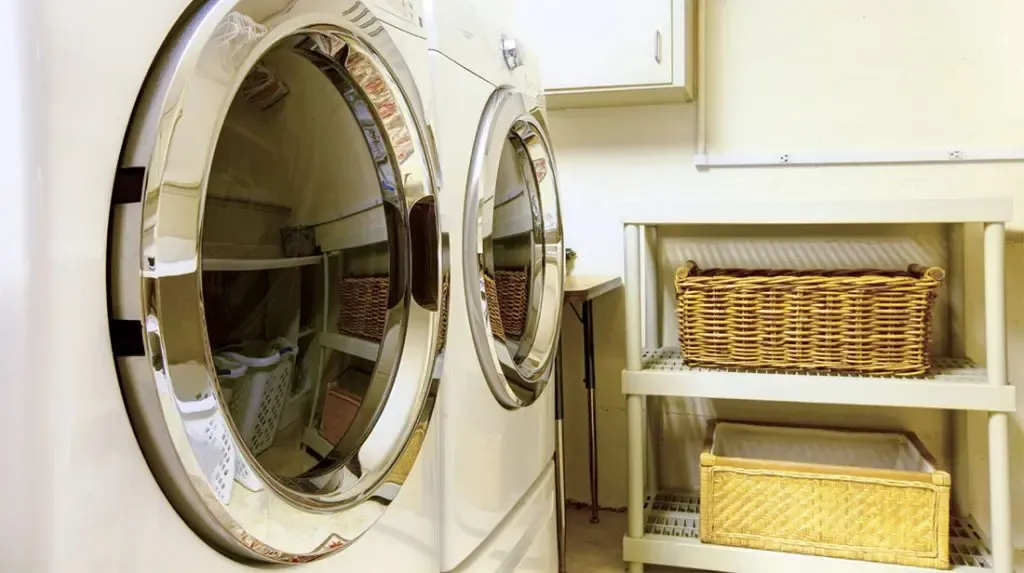
Inside That Works: Shelves, Bins, and Task Zones
Looks help, but function wins. Set shelves for detergents, stain sticks, and jars. Create a “prep” spot for sorting and a “finish” spot for folding or steaming.
Use adjustable shelves for bottles and baskets. Add a slim pull-out for sprays. Keep a shallow bin by the dryer for lint and dryer sheets. Label lightly so guests and teens can help without asking. Keep heavy items near waist height.
Zones that save time
- Prep zone: Stain removers, brushes, small bowl for mixes, rubber gloves.
- Wash zone: Detergent, boosters, mesh bags.
- Dry zone: Lint bin, dryer sheets or balls, clothespins.
- Finish zone: Steamer, lint roller, folding board.
Sample shelf plan
| Shelf | Contents | Height tip |
| Top | Bulk refills, paper goods | Use clear bins; label front |
| Middle | Daily detergents, sprays | Eye level; quick grab |
| Lower | Towels, rags, baskets | Easy return after use |
| Door backs | Hooks for bags and gloves | Keep small tools visible |
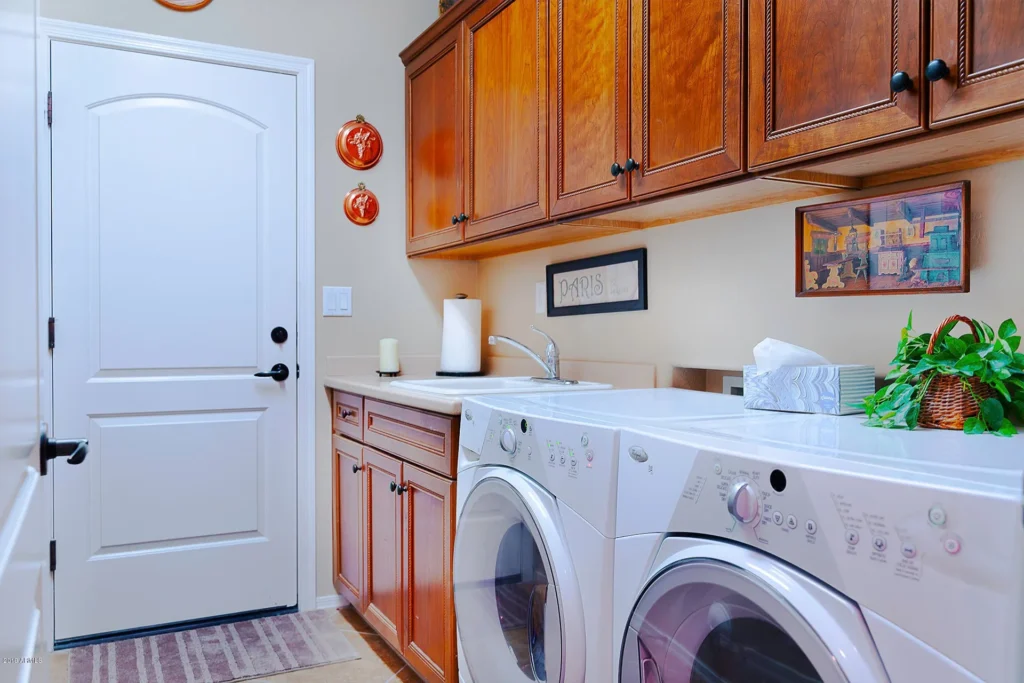
Counters, Sinks, and Service Clearances
A durable counter transforms the room. It adds a landing space for clothes and a place to fold. Choose a worktop that fits your style and budget. Keep access to valves, traps, and the vent.
A continuous counter over front-load machines looks clean and adds utility. A solid wood butcher-block top brings warmth and is easy to scribe to walls (see “butcher block” under worktops on Wikipedia if you want background: butcher block). Stone counters resist heat and stains but need careful templating. Leave service gaps and removable panels near valves and clean-outs. Do not trap the vent or plug a dryer exhaust path.

Utility checklist
- Water: Install shutoffs within reach. Leave a clear path to valves and the trap.
- Electrical: Keep receptacles accessible. Use cord access grommets behind small appliances.
- Vent: Maintain a straight, short dryer vent path where possible.
- Drips: Consider a shallow tray under detergents; it saves doors and shelves from spills.
Counter options at a glance
| Material | Pros | Watch-outs |
| Butcher block | Warm, easy to cut and scribe | Needs oil or finish; avoid standing water |
| Laminate | Budget-friendly, many looks | Mind heat and knife cuts |
| Quartz/stone | Durable, low maintenance | Cost; plan for templating and support |
| Composite | Stable, stain-resistant | Check edge options and color match |
Fasteners, Anchors, and Safety Basics
Good screws, correct pilot holes, and consistent spacing are simple insurance. Avoid drywall anchors for cabinet weight. Hit studs, then tie boxes to each other.
Use cabinet-rated screws with large heads and the right length for your wall. Pre-drill near edges to avoid splits. Wear eye protection. Lift with help. Keep the floor clear of offcuts and cords while you hang boxes.
Fastener guide
| Wall type | Primary fastener | Note |
| Wood studs | 2½–3 in cabinet screws | Penetrate stud ~1½ in |
| Masonry | Sleeve anchors/Tapcon type | Use correct pilot size/depth |
| Steel studs | Fine-thread self-drilling | Consider plywood backer for stiffness |
Safety mini-list
- Lift with two people or use a cabinet jack.
- Unplug appliances while working.
- Mask and goggles when drilling overhead.
- Keep pets and kids out until screws are set.
Finish and Maintain
Once doors are aligned and soft-close is set, wipe dust, remove the ledger, and patch holes. Run a fingertip around edges to feel for snags, then sand and touch up as needed.
Small care keeps the wall looking new. Tighten handles in a month after wood settles. Keep a gentle cleaner for doors. Wipe spills fast. Open the window or run a fan when using strong stain removers at the counter.

Hinge and door tune-up
| Adjustment | Result |
| Left/right screw | Centers door over the reveal |
| In/out cam | Flush door to face frame |
| Up/down plate | Aligns top edges across doors |
| Soft-close clip | Sets swing speed and stop |
Conclusion
Measure cleanly, mount into studs, and keep things level. Join boxes first, then hang as one. Finish with fillers and crown. Respect clearances. Your laundry room will look custom and work daily.
Share Your Plan, Get Ideas
Send a quick sketch and a few photos. We can mark stud hits, choose sizes, and map a trim set that fits your wall and machines. 想开始了吗?把户型图发给我们就行。