Messy grout ruins beautiful tile. Smears, cracks, color shifts. You can fix it. Use the right mix, pack it well, and cure it right.
We are a one-stop building-materials supplier rooted in Foshan, serving overseas projects. We cover kitchens, wardrobes, bathrooms, windows and doors, tiles, lighting, flooring, and wall panels. We work with homeowners, contractors, designers, developers, and builders. We also provide interior and facade 3D design, full-home style matching, export logistics, and after-sales support. The goal is simple: clear advice and dependable delivery.
Here is the fast path: choose the right grout for the joint and tile, stage your tools, mix to steady “peanut-butter” thickness, pack at 45°, clean at the right time, then cure and seal. Do this and your lines stay neat.
You will see the full playbook below. Start with the type that fits your tile and joint. Then move through prep, mixing, spreading, cleaning, curing, and sealing. Each step is simple when you keep the rules tight.
Choosing the Right Grout for the Job
Bad grout choice shows up fast: cracks, shade issues, stains. Pick by joint width, tile sensitivity, room moisture, and your install speed. Match chemistry to use. That one choice solves most problems before they start.
The right grout depends on three things: joint width, surface type, and exposure to water or stains. Cement grout fits most floors and walls. Epoxy shines in wet or greasy zones. Narrow joints on delicate tiles often need smoother mixes. Always check the joint size and tile finish first.
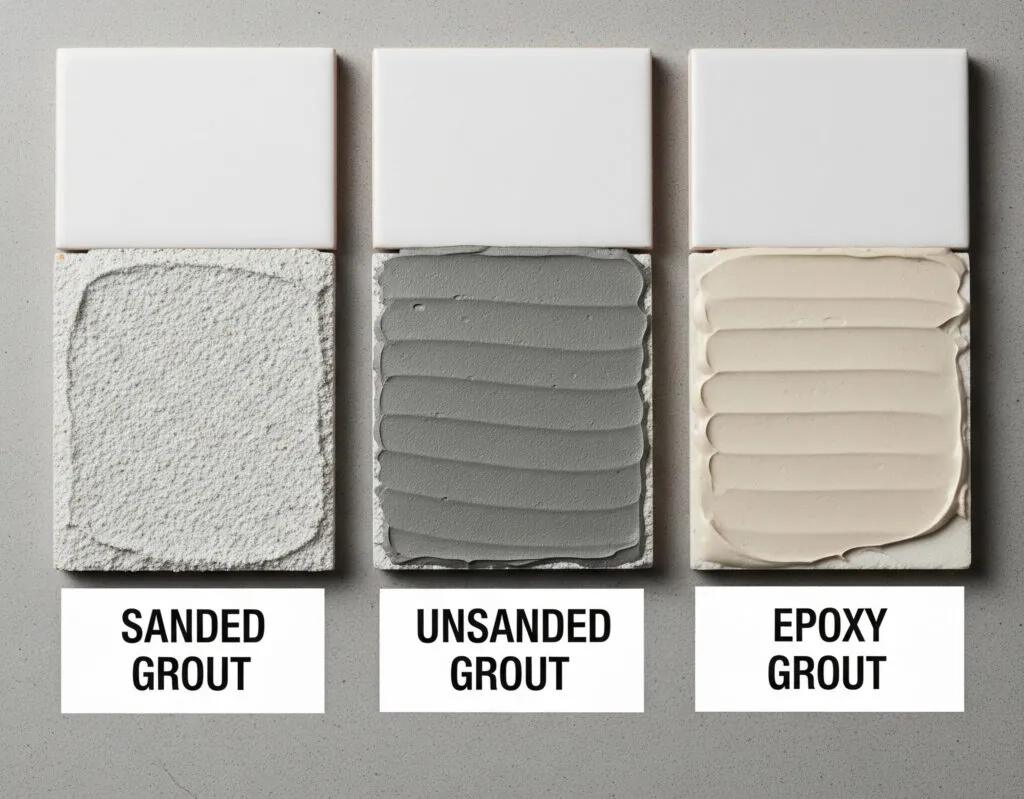
Grout is the filler that locks tiles and protects the substrate. If you want a clear overview of the material itself, see grout. For selection, think function first, looks second. Joint width and tile surface drive the decision more than color swatches. Sanded cement grout works well for wider joints and floors. Unsanded cement grout suits thin joints and sensitive surfaces. Epoxy is tough and stain-resistant, good for showers, kitchens, and heavy-use spaces. Single-component (often urethane or acrylic premix) gives easy handling but needs slower, careful cleaning. If your tiles are handmade or have rough edges, allow a wider joint so the pattern reads clean. With glass, polished stone, or metal, protect against scratching. Test on a spare piece and review color after a small mock-up. When in doubt, follow the joint size the tile maker suggests.
Sanded vs. Unsanded (and More)
| Type | Best For | Joint Width | Pros | Watch-outs |
| Cement, Sanded | Floors, wide joints | ~1/8″–1/2″ | Durable, cost-effective | Can scratch soft tiles |
| Cement, Unsanded | Walls, delicate tiles | ~1/16″–1/8″ | Smooth finish, less scratch risk | Shrinks more, weaker on wide joints |
| Epoxy | Wet zones, stains, kitchens | ~1/16″–3/8″ | Strong, stain-resistant | Higher cost, strict clean-up |
| Single-Component (Premixed) | DIY speed, small areas | ~1/16″–1/4″ | Ready to use, flexible work time | Long cure, precise wipe timing |
Tip: Epoxy is a thermoset resin system. If you want the chemistry at a glance, see epoxy. Use it where stains or harsh cleaners are common.
Tools and Setup You Actually Need
Rushing setup leads to smear marks and rework. Lay out tools, protect edges, and plan the path. Clear the surface. Stage water and sponges. Your joints will thank you.
Great grouting needs simple tools used well: a rubber float, two buckets, clean sponges, microfiber cloths, mixing paddle, and gloves. Add knee pads, tape, and edge protection. Keep a timer and good lights. Set the room for easy movement.

A clean station makes the job smooth. Place two buckets: one for initial rinse, one for final rinse. Use a drill with a mixing paddle if you are mixing powder. Keep your float at hand and a spare sponge ready. Protect adjacent finishes with tape and drop cloths. Pull tile spacers and vacuum dust from joints so the grout can bond well. If the tile is porous or textured, consider a light pre-seal to reduce staining; test this first. Plan your “zones” so you never walk through fresh work. Work away from entries and toward an exit. Mind temperature and humidity. Warm, dry rooms speed set time. Cool or damp rooms slow it. Keep windows cracked for airflow, but avoid strong drafts that dry the surface too fast. Set a timer for the wash window the bag or pail suggests. A steady pace beats speed. The goal is clean joints, not fast joints.
Quick Kit Checklist
- Grout float, margin trowel
- Drill with paddle (for powder mixes)
- Two buckets, three sponges, microfiber cloths
- Spray bottle with clean water
- Tape, drop cloths, knee pads, gloves, timer
- Optional: haze remover, small brush, shop vacuum
Mix to the Right Consistency
Too wet and grout shrinks or washes out. Too dry and it crumbles. Aim for smooth, spreadable, and creamy. Think “peanut-butter thick,” not soup and not clay.
Mix by weight or volume as the bag states. Let it rest (slake) and remix. Do not keep adding water. Work in small batches so each pan stays fresh for the zone you can reach.
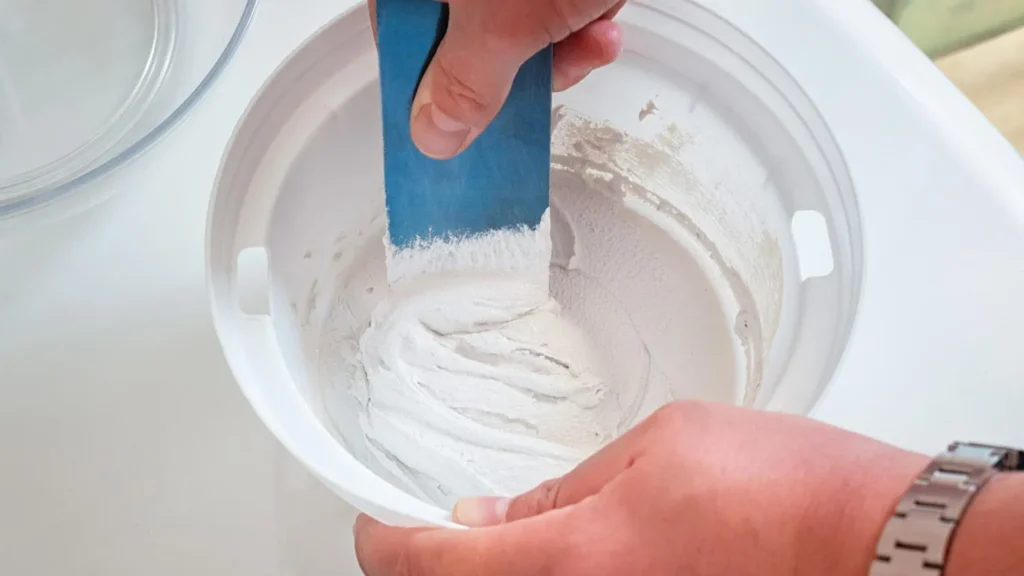
Most cementitious grout uses a binder based on Portland cement. It gains strength through hydration, not “drying” alone. That is why the water ratio matters. Follow the printed ratio, mix with a paddle for uniform paste, then let the mix rest for a few minutes so powder wets out. Remix briefly and start. Do not add water after slaking; it weakens the matrix and shifts color. If the room is hot, mix smaller batches. Keep tools damp but not dripping. For epoxy, you combine parts A and B fully, then keep the pot life in mind; never split unmeasured kits. With premixed products, stir to loosen the pail, then close the lid between pulls. Check color and texture on a test board. Press a small bead into a joint and let it set for ten minutes. Wipe and confirm the shade. If it looks patchy, your water use may be high or the surface too dusty. Fix the cause before you go big.
Mix Targets
| Goal | Cement Grout | Epoxy / Single-Component |
| Texture | Smooth, holds ridges | Spreadable paste, no lumps |
| Rest (Slake) | 2–10 minutes, then remix | N/A for epoxy; stir premix |
| Batch Size | What you can spread in 15–25 minutes | What you can spread within pot life |
Spread at 45 Degrees and Pack the Joints
Streaks and hollow lines come from weak pressure and the wrong angle. Hold the float at 45°. Push diagonally across joints. Pack, then skim off the excess.
Your first pass fills, the second pass shaves. Keep strokes firm. Work small sections so the surface film does not harden before you wash.
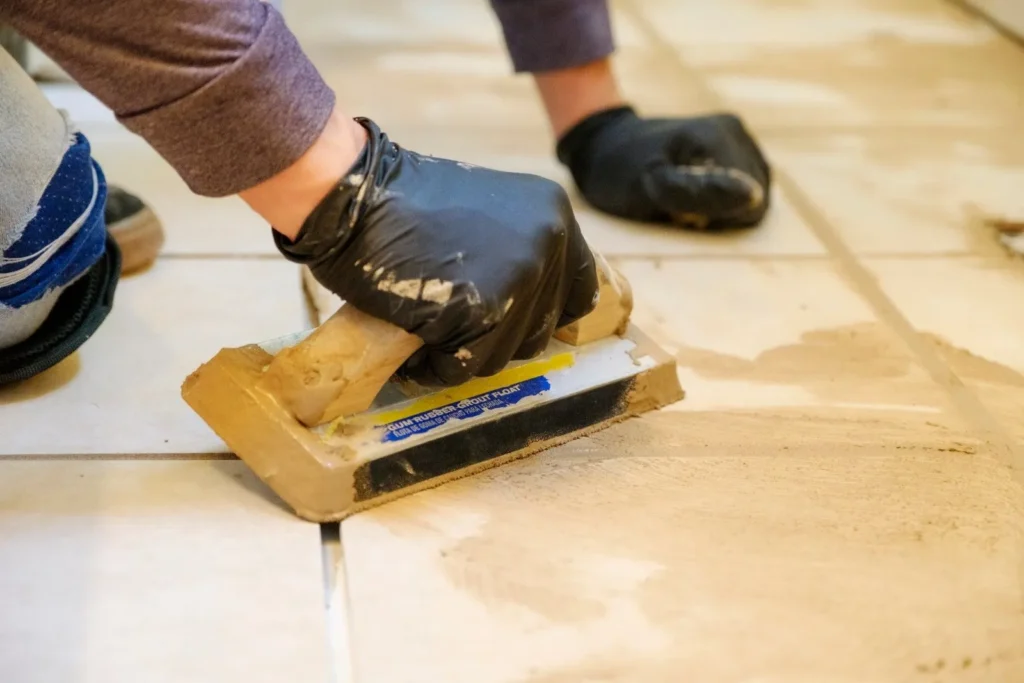
Begin on a clean, dry surface. Dump a line of grout on the tile, then hold the float at about 45 degrees. Push across joints, not along them. This packs grout deep and avoids pulling it back out. Make two or three diagonal passes until joints are full. Skim off extra with the float held near upright. Keep the float edge clean. Move in zones you can wash within the maker’s window. Watch corners and changes of plane. These are movement joints, so do not force hard grout into them. Leave them clean and switch to flexible silicone later. For walls, start at the top and work down in bands. For floors, start in a corner and move toward your exit. Keep your stance steady and your bucket close. If you see a joint sag, repack it right away. Consistency now saves time later. The pattern is simple: fill, shave, wait, wash.
Pack, Then Shave
| Pass | What You Do | Why It Matters |
| Fill | Firm diagonal strokes | Full depth, no voids |
| Shave | Light skim with clean edge | Smooth surface, easy cleanup |
| Check | Look for lows and pinholes | Touch-up before washing |
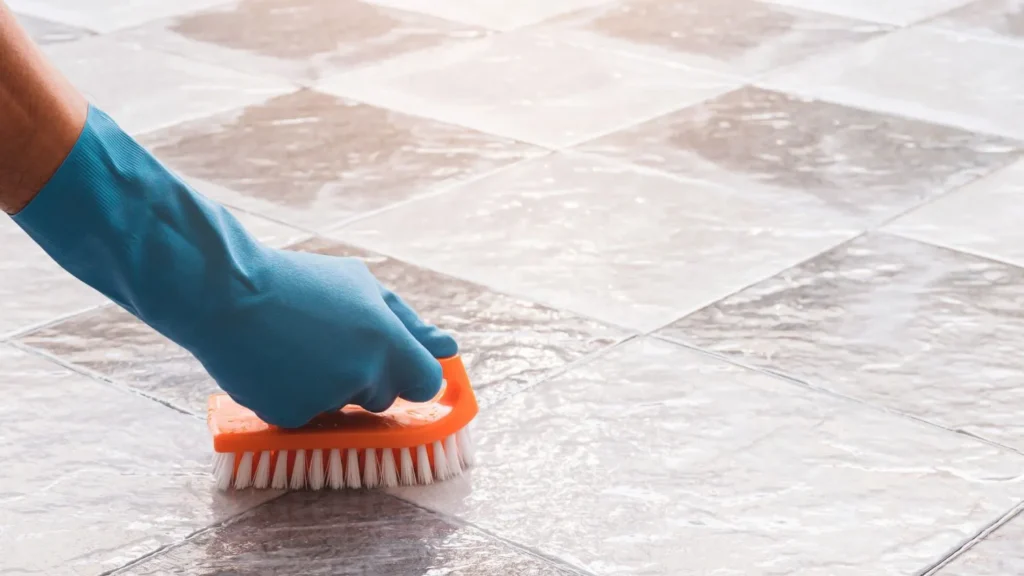
Wash, Buff, and Cure Without Haze
Most haze comes from early, wet wiping. Wait for the sheen to dull. Use light passes with a damp sponge. Flip often. Then buff with microfiber. Let joints cure in peace.
Timing matters. Clean too soon and you pull out pigment. Clean too late and you scrub forever. A careful two-stage wipe keeps color and saves effort.

Set a timer based on the bag or pail. Test with a finger: the film should turn dull and resist a light touch. Start the first wash. Use a damp—not wet—sponge. Wipe in gentle arcs. Rinse in bucket one, wring hard, then rinse in bucket two. Keep the sponge flat to avoid scooping grout out of joints. After the first pass, let the film sit for a few minutes. Then use a clean microfiber cloth to buff the surface and lift the haze. If a stubborn film remains, wait until the next day and use a haze remover suited to your grout chemistry. Do not flood the floor. Avoid fans that dry the surface too fast. Protect the area from foot traffic while early strength builds. Heat and low humidity speed cure; cold and damp slow it. Ask for the maker’s “walk-on,” “shower-use,” and “seal-after” times and stick to them. Patience here gives you even color and strong joints.
Cure Window (Typical)
| Action | Cement Grout | Epoxy / Premix |
| Light foot traffic | ~24 hours | ~24 hours |
| Full cure strength | ~72 hours+ | ~24–72 hours (type-specific) |
| Ready to seal (cement) | After full cure | Often not required |
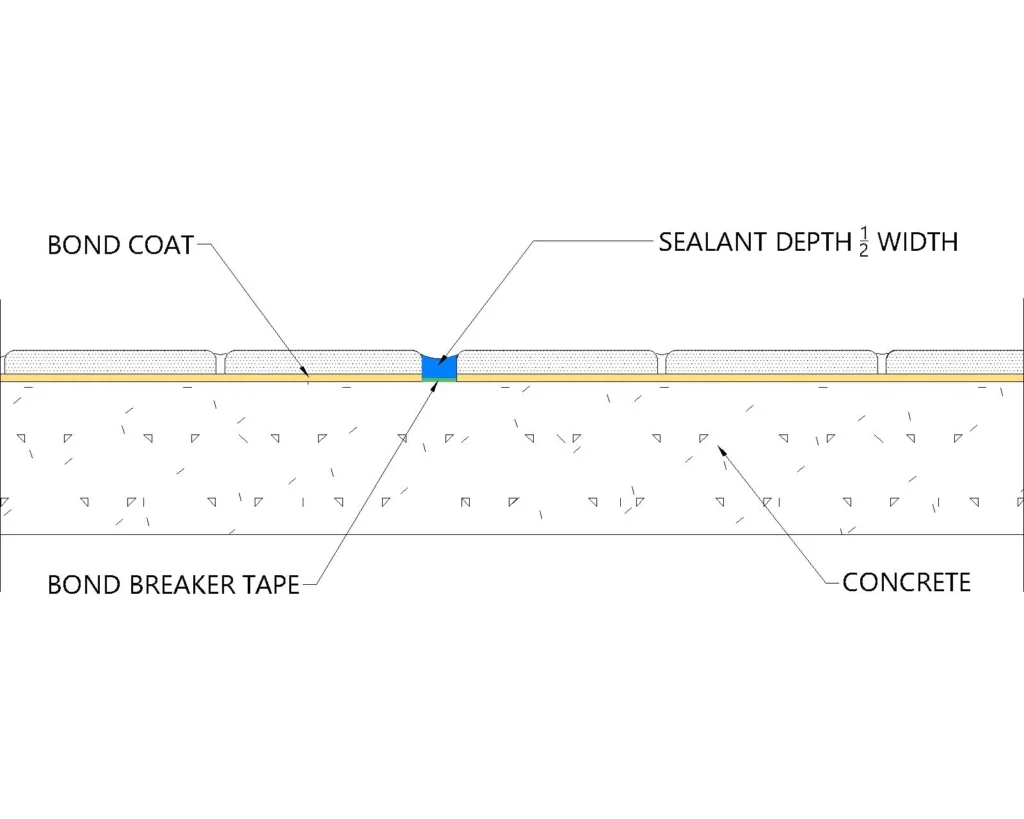
Seal, Silicone, and Movement Joints
Grout is not a waterproof membrane. Seal cement grout after cure for stain resistance. Use silicone at changes of plane. Leave movement joints where the room needs to flex.
This trio—seal, silicone, and movement—keeps the job clean and dry. It stops stains, handles movement, and prevents cracks at edges and corners.

After cure, most cement grouts benefit from a penetrating sealer. Apply with a small brush or applicator bottle. Work clean, wipe excess from tile faces before it dries. Re-seal high-use showers and kitchen floors on a schedule the product suggests. For corners, tub edges, and wall-to-floor seams, use a quality silicone sealant. Grout is rigid; silicone can flex with seasonal movement and thermal change. Keep movement joints free along long runs, between different substrates, and around perimeters. If tiles sit over radiant heat or on a deck, plan more relief. For wet rooms and pools, grout is only one part of the system; waterproofing behind the tile does the heavy lifting. Review slope, drains, and membrane details before you seal. Finally, set a care plan: mild cleaner, soft brushes, and quick repair when a chip appears. Small fixes now avoid bigger work later.
Common Issues and Fast Fixes
| Symptom | Likely Cause | First Fix |
| Haze won’t wipe | Washed too late/too wet | Next-day haze remover; microfiber buff |
| Cracks at corners | Movement at plane change | Remove grout; apply color-matched silicone |
| Pinholes in joints | Thin mix or over-washing | Repack small areas; let set longer |
| Stains in grout | Unsealed cement grout | Deep clean; apply penetrating sealer |
Conclusion
Strong grout lines come from smart choices and steady steps. Pick the right type, mix well, pack deep, wash on time, then cure and seal with care.
Share Your Plan, Get Ideas
If you have a layout, send the plan and a few photos. We will mark quick wins, suggest grout types, and flag risk spots before work starts. Want to begin? Just send us your floor plan.