Good cabinets should not feel like guesswork. Use the right material, mark clear lines, and follow a simple order. You will get square boxes and tight reveals.
You build a reliable cabinet by planning cut sizes, using safe saw methods, keeping boxes square, and fixing them to studs. Plywood sides, pocket-hole joinery, glue, and screws make a strong case you can trust.
Keep reading for simple steps and print-ready checks. Each section starts with a short answer, then gives details, tables, and mini checklists you can bring to the shop.
What tools do I need to build a cabinet?
Too many tools cause stress and delay. A lean kit speeds you up and keeps cuts consistent.
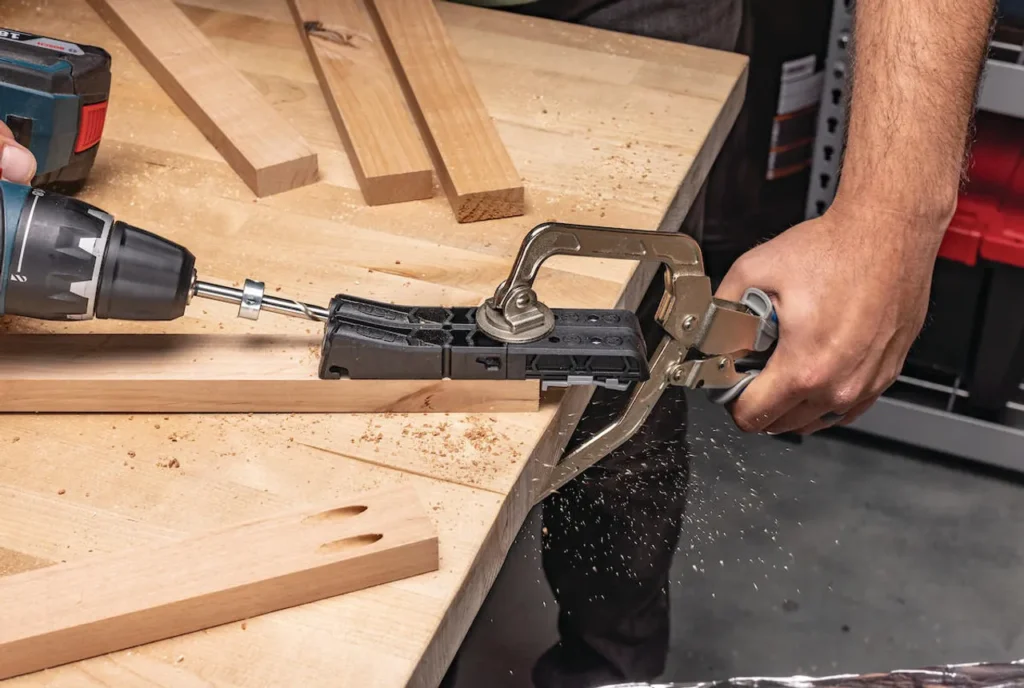
You can build a full cabinet with a circular saw and guide, a drill/driver, clamps, a square, and a pocket-hole jig. Add a sander for edges and a dust mask for safety. A table saw and miter saw are nice to have but not required.
Core kit and purpose
- Cutting: Circular saw + straightedge or track guide.
- Drilling: Drill/driver, pocket-hole jig, countersink bit.
- Measuring: Tape measure, combo square, pencil, marking knife.
- Workholding: Two bar clamps and two face clamps.
- Surface: Random-orbit sander with 120–220 grit.
- Safety: Eye and ear protection, dust mask or respirator.
Tasks and tool match-up
| Task | Must-have | Helpful upgrade | Quick tip |
| Rip plywood | Circular saw + guide | Table saw | Support sheet with foam board |
| Crosscut panels | Circular saw | Miter saw | Use a square to set the guide |
| Drill joinery | Drill/driver | Drill press | Set a stop collar for depth |
| Hold parts | Bar + face clamps | Parallel clamps | Dry-fit before driving screws |
| Sand edges | Random-orbit sander | Edge trimmer | Break sharp edges first |
Setup notes
Set a flat work surface. Keep the bench clean so panels sit flat. Label each part as you cut it. This removes confusion later.
Which plywood thickness is best for cabinet boxes?
Too thin and boxes flex. Too thick and they add weight and cost.
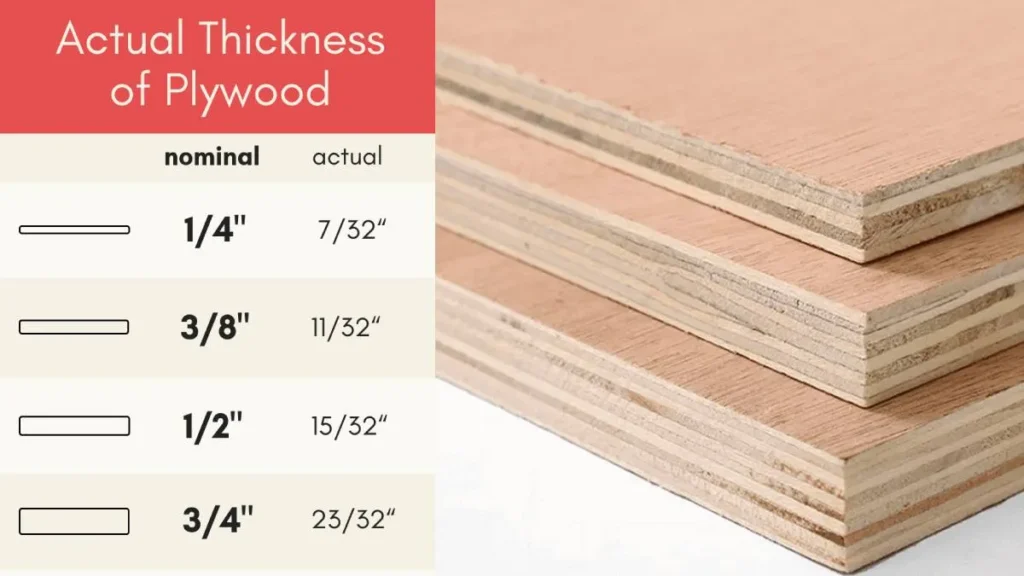
Use 3/4 in (19 mm) for sides, bottoms, tops, and shelves. Use 1/4–1/2 in (6–12 mm) for backs set in dados or rabbets. This balance keeps hardware tight and boxes stiff without wasting material.
Thickness guide
| Part | Typical thickness | Why it works |
| Sides, bottom, top | 3/4 in (19 mm) | Holds screws and hinges well |
| Shelves | 3/4 in (19 mm) | Resists sag; add edge banding |
| Back | 1/4–1/2 in (6–12 mm) | Braces the box; saves weight |
| Drawer boxes | 1/2 in (12 mm) | Light but strong; 1/4 in bottoms |
Buying and storing
Pick flat sheets with clean faces. Choose the best factory edge as your reference edge. Store sheets flat on a level base so they do not bow before cutting.
Frameless or face frame—what’s better for beginners?
Picking a style late can force rework. Pick early so cuts, hinges, and reveals match.
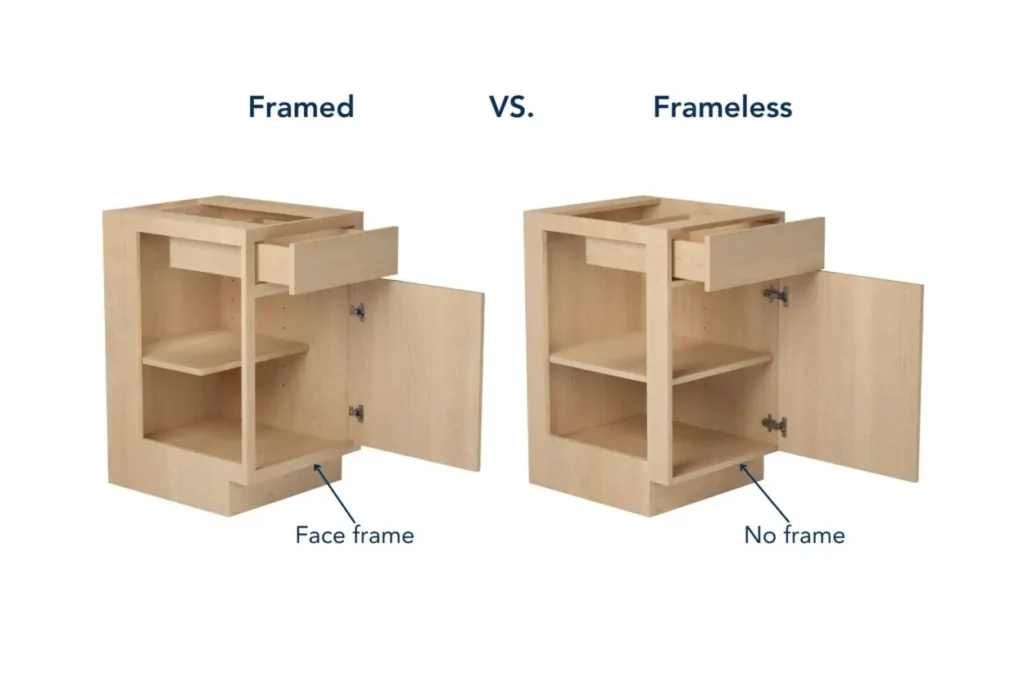
Both styles work for first builds. Frameless is faster and uses edge banding. Face frame hides edges and gives a bit more tolerance during install. Choose the look you like and the method that fits your tools.
Quick comparison
| Feature | Frameless | Face frame |
| Build speed | Faster | Slightly slower |
| Edge treatment | Edge banding | Frame hides edges |
| Opening width | Wider | Slightly smaller |
| Hardware | Euro hinges, slides | Face-frame hinges or spacers |
| Tolerance | Needs precise cuts | Forgives small errors |
| Look | Modern | Classic |
Simple advice
If you want quick progress and a modern look, go frameless. If you want a traditional look and easier door alignment, add a face frame. You can still use the same box sizes either way.
What are standard cabinet dimensions and clearances?
Wrong sizes cause poor fit, blocked doors, and tight walkways.
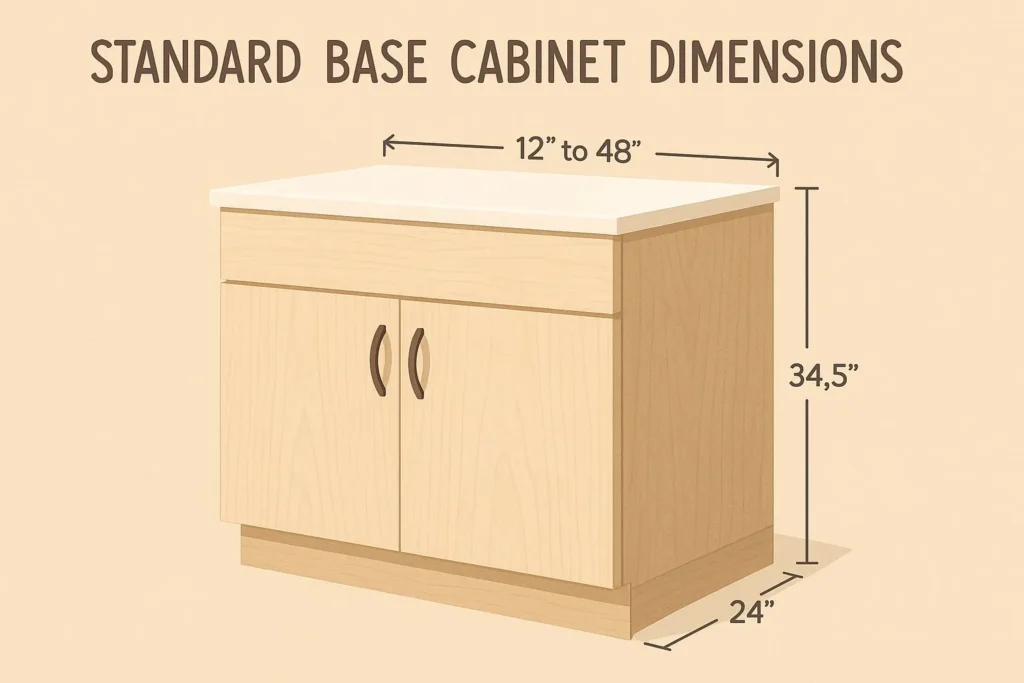
Base cabinets are about 34½ in high without tops and 24 in deep. Wall cabinets are about 12 in deep. Leave about 18 in between counter and uppers. Widths often come in 3-inch steps, such as 12–36 in.
Size table
| Item | Common size or range |
| Base height (no top) | 34½ in |
| Finished counter height | 35–36 in |
| Base depth | 24 in |
| Wall depth | 12 in (some 14–15 in) |
| Counter to uppers | ~18 in |
| Toe kick | ~4–4½ in high, ~3 in deep |
Layout tips
Snap a level line around the room. Find the highest spot on the floor and start the first base there. Plan fillers and scribe strips for walls that are out of square.
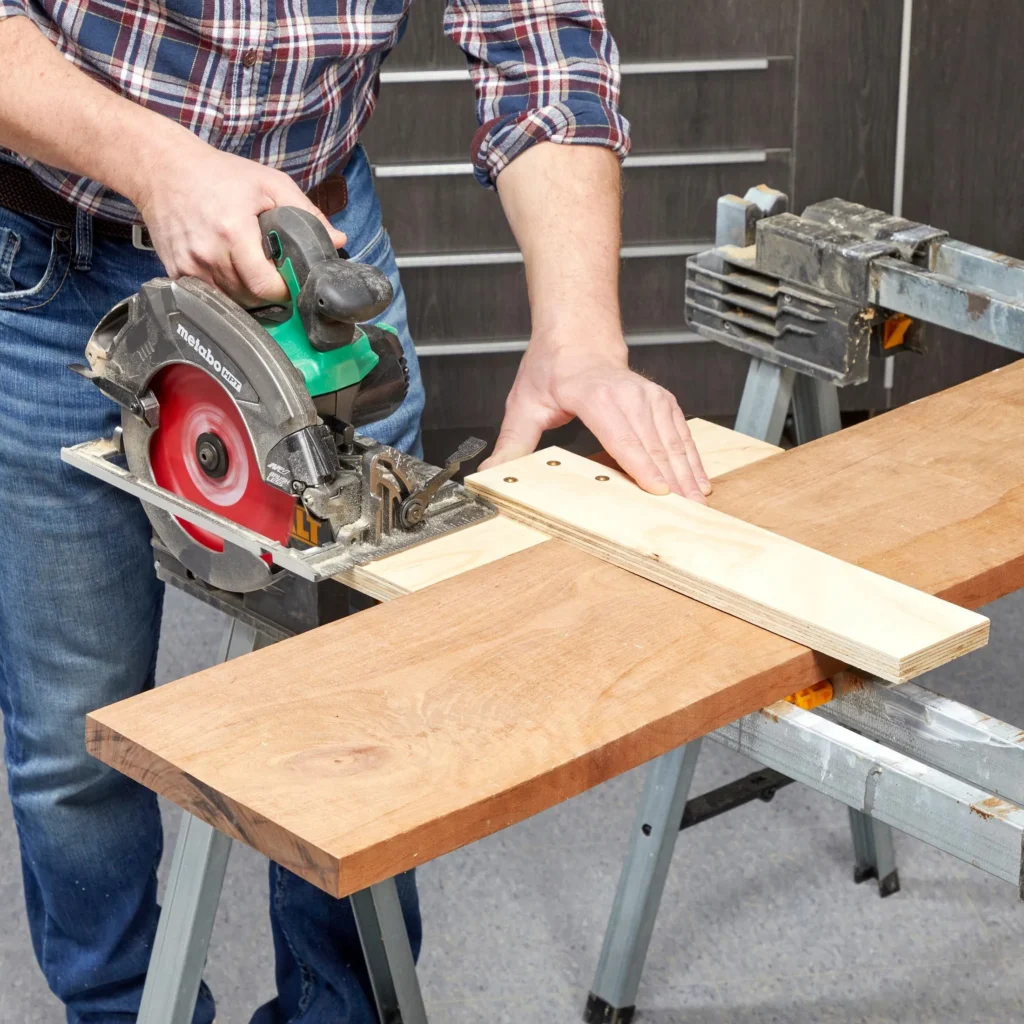
How do I cut plywood safely and accurately?
Tear-out and crooked cuts ruin edges and waste sheets.
Support the sheet, mark a clean line, clamp a straightedge, and make the cut with a sharp blade. Keep the good face down when using a circular saw. Let the saw reach full speed before you move.
Simple cutting flow
Setup
Lay foam board on the floor or a large table. Support the entire sheet so offcuts do not drop.
Mark
Measure twice. Use a long straightedge. Mark the kerf offset for your guide.
Cut
Clamp the guide. Start the saw outside the sheet. Keep steady feed; do not force. Pause if the cord snags.
Edge care
Lightly sand. Apply edge banding on exposed edges. Trim banding flush with a sharp blade and block.
Safety
Wear eye and ear protection. Keep hands away from the blade path. Unplug before changing blades or adjusting guards.
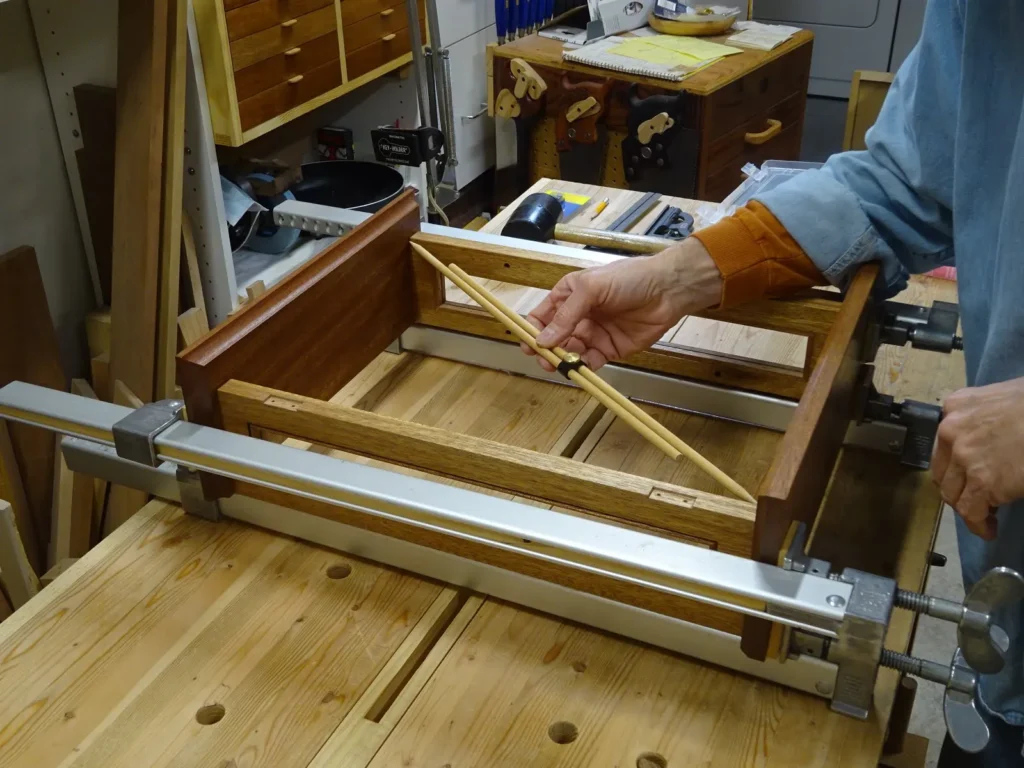
How do I build a square cabinet box?
Out-of-square boxes cause door rub, drawer jams, and uneven reveals.
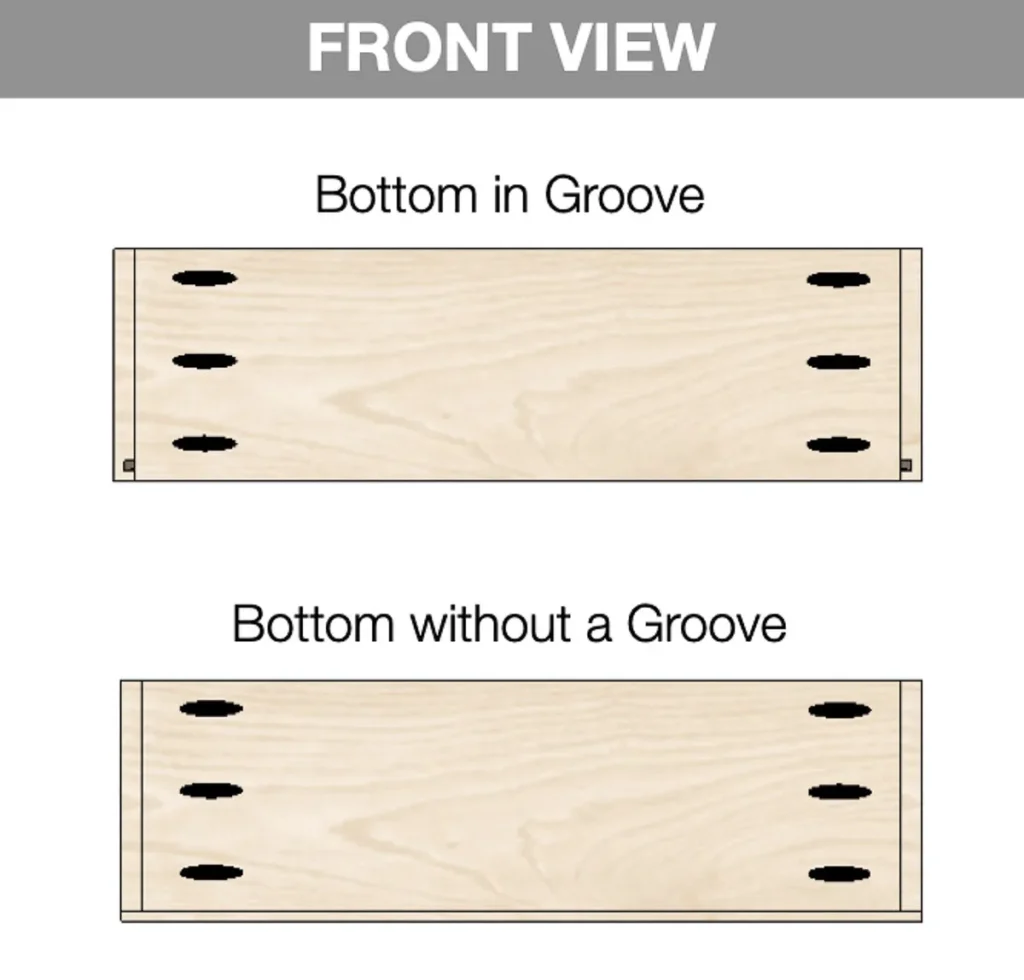
Assemble on a flat surface. Use pocket holes or screws with glue. Check both diagonals; adjust until they match. Install the back in dados or rabbets to lock the shape.
Build order that works
- Cut parts: sides, bottom, top or stretchers, and back. Label each piece.
- Drill joinery: pocket holes along the bottom and top edges, or pre-drill pilot holes.
- Dry-fit: clamp parts and check diagonals.
- Glue and screw: drive fasteners while clamped so parts do not shift.
- Square check: measure both diagonals again. Nudge corners until equal.
- Back on: glue and pin a back into dados, or screw a thicker back to stretchers.
Extra stiffness
Add corner blocks inside base boxes. Add a front stretcher to support the countertop. For wide uppers, add a top panel or a second stretcher.
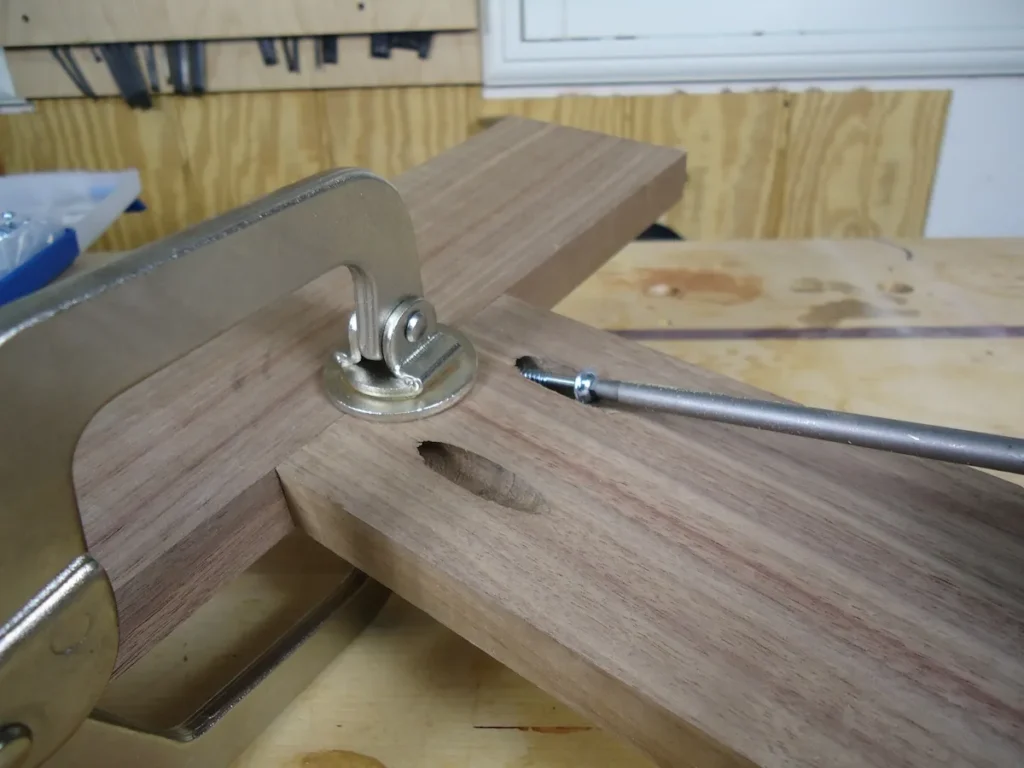
Are pocket-hole joints strong enough for cabinets?
Loose joints come from poor setup, not from the method itself.
Pocket-hole joinery makes strong cabinet boxes when you add glue, use the right screw length, and clamp across the joint during driving. Prevent racking with a full back or sturdy stretchers. Once on the wall, the case gets even stiffer.
Best practices
- Set the jig and bit depth for 3/4 in material.
- Use the proper screw thread for plywood.
- Space holes about every 6–8 in on long edges.
- Clamp faces flush before you drive.
- Add glue to the joint to stop squeaks.
- Wipe squeeze-out. Recheck square.
When to choose a different joint
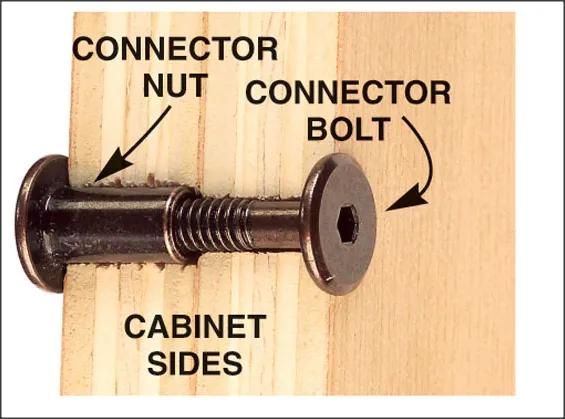
If the outside face will show, consider hidden methods like dowels or confirmat screws. For very heavy loads, add internal blocks or stretchers so screws are not the only thing resisting racking.
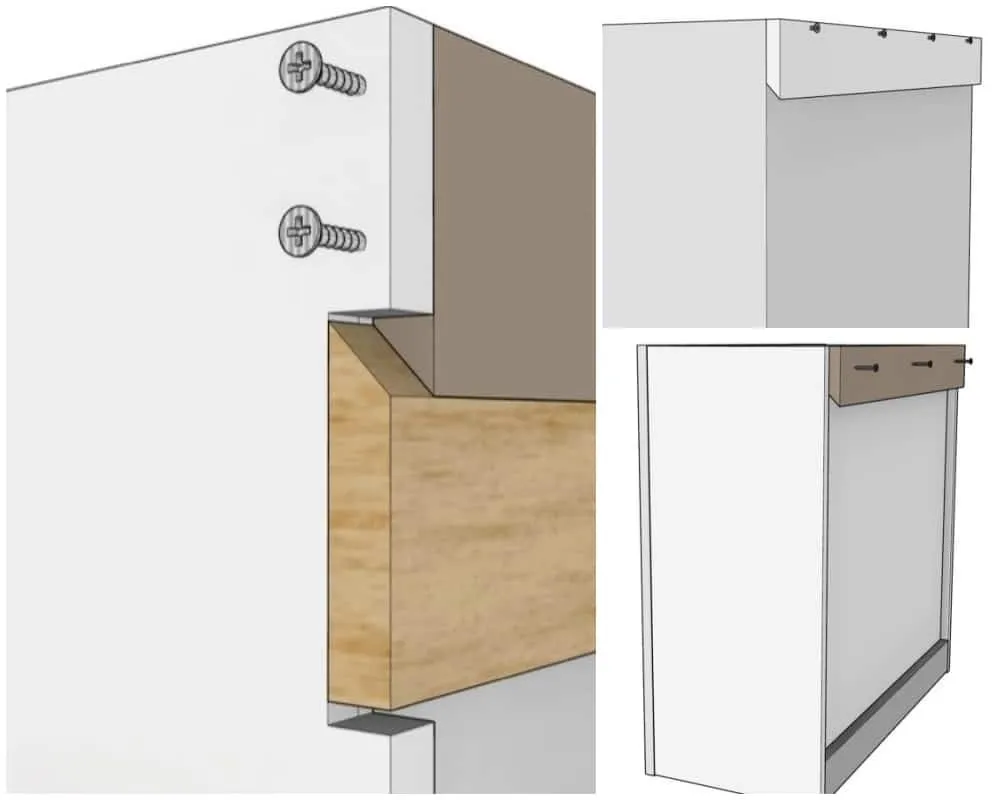
How do I hang upper cabinets on studs?
Uppers are heavy and hard to hold in place. If they slip, you get bad lines and unsafe mounts.
Find studs, mark a level line, and screw a straight ledger cleat on that line. Remove doors and shelves to reduce weight. Lift the first cabinet onto the cleat, tack to studs, then clamp and join the next cabinet before final screws.
Step-by-step
- Locate studs and mark center lines.
- Snap or draw a level line where cabinet bottoms will sit.
- Screw a straight ledger to the wall along that line.
- Set the first cabinet on the ledger. Pre-drill through the back stretchers.
- Drive two screws into studs to hold it.
- Set the next cabinet, clamp faces flush, then join the two cases.
- Add final screws into each stud. Remove the ledger and patch holes.
Alignment checks
Use a long level or straightedge across faces. Small shims behind backs or at studs will correct gaps. Tighten only after everything lines up.
How do I level and join base cabinets?
Floors are rarely flat. If you chase the floor, doors will not align.
Find the highest point on the floor and start there. Mark a level line for the finished counter height minus top thickness. Shim the first base to hit the line. Screw it to studs, then clamp and join the next box, checking level as you go.
Practical flow
- Set a reference line for tops.
- Shim under the first box until the front edge hits the line.
- Screw to studs through stretchers.
- Clamp the next box flush at the front edge.
- Drive joining screws behind hinge plates or inside front edges.
- Recheck level left-to-right and front-to-back every few feet.
Toe-kick choices
| Method | Pros | Cons |
| Platform base | Easy to level a whole run | More parts to build |
| Integrated cutout | Fewer parts; fast | Each box must be shimmed |
How do I size and install cabinet doors?
Wrong door sizes cause rub and uneven gaps. Guessing leads to re-cuts.
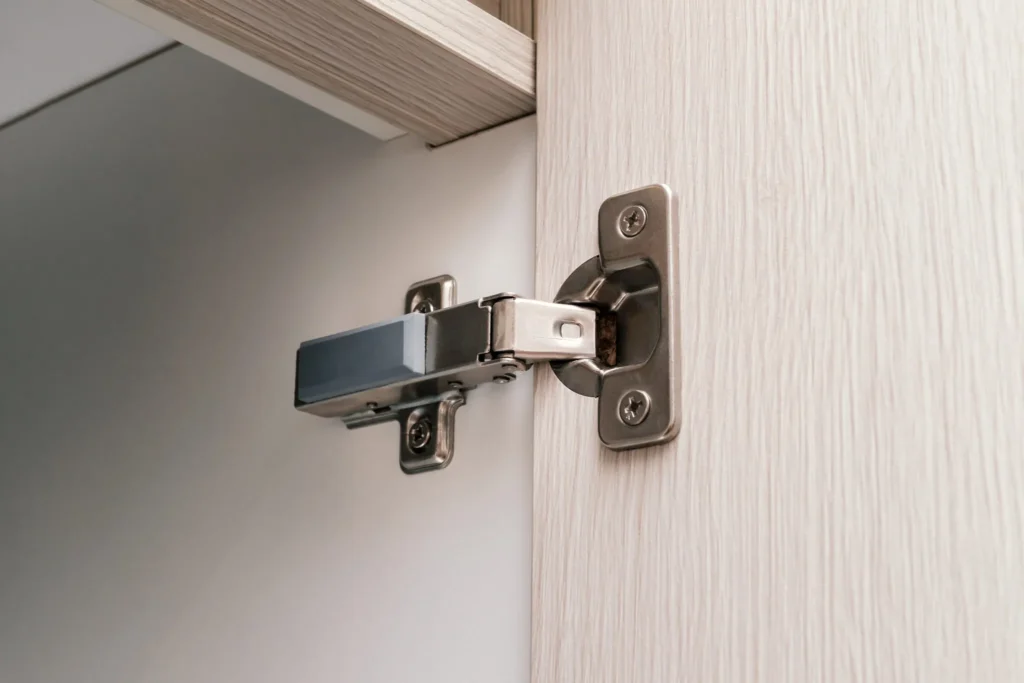
Choose overlay or inset first. For overlay, add the overlay amount to the opening size. For inset, size doors slightly smaller than the opening and aim for even gaps. Use adjustable hinges so you can fine-tune reveals.
Sizing guide
| Style | Basic rule |
| Full overlay | Door = opening + overlay on each side |
| Half overlay (two doors) | Each door = opening ÷ 2 + overlay − center gap |
| Inset | Door = opening − 1/16–1/8 in all around |
Install order
Mount hinge cups in the door. Screw plates in the case or frame. Hang the door and set side gaps, then top and bottom gaps. Adjust depth last so faces sit even. Add soft bumpers to stop rattle.
Conclusion
Plan your cuts, keep boxes square, fasten to studs, and set clean reveals. Simple tools and a clear order give you cabinets that look good and last.
FAQ
Can I build cabinets without a table saw?
Yes. A circular saw with a straightedge or track guide makes accurate rips and crosscuts. Support sheets well and mark a clear kerf offset for your guide.
What wood is best for cabinet boxes besides plywood?
Plywood is most stable, but MDF and particleboard are options for paint-grade work. Seal edges and use proper fasteners because they hold screws differently than plywood.
How far apart should cabinet screws be into studs?
Aim for each cabinet to have screws in at least two studs. Place two screws per stud through stretchers, then add more if the box is wide or holds heavy items.
Do I need to pre-finish parts before assembly?
You can. Pre-finishing saves time on inside corners and avoids drips. Mask glue areas so finish does not block bond. Touch up after assembly.
How much gap should I leave between two cabinet doors?
Plan about 1/16–1/8 in total between meeting doors. Use hinge adjustments to fine-tune after hanging so reveals match across the run.
Can I build cabinets with only pocket holes?
Yes for box joinery, if you add glue and a solid back or stretchers. For visible faces, choose a hidden method or place screws where they will be covered.
What is the best finish for plywood cabinets?
Water-based clear coats are easy and low odor. Oil-based coats level well and are very tough but take longer to cure. Light sanding between coats gives a smooth feel.
How do I deal with uneven walls when installing?
Use scribe strips or fillers at ends. Shim backs at studs to keep faces in a straight line. Scribe toe-kicks to the floor after the boxes are fixed.