Spills leave rings. Harsh cleaners etch. Dust brings scratches. You want shine without stress. This guide shows safe cleaning, smart sealing, and simple stain fixes that work.
We are a one-stop building-materials supplier based in Foshan, working with overseas projects. We cover kitchens, wardrobes, bathrooms, windows and doors, tiles, lighting, flooring, and wall panels. We support homeowners, contractors, designers, developers, and builders. We also help with interior and facade 3D design, whole-home style matching, export logistics, and after-sales support. The goal is clear steps and steady results.
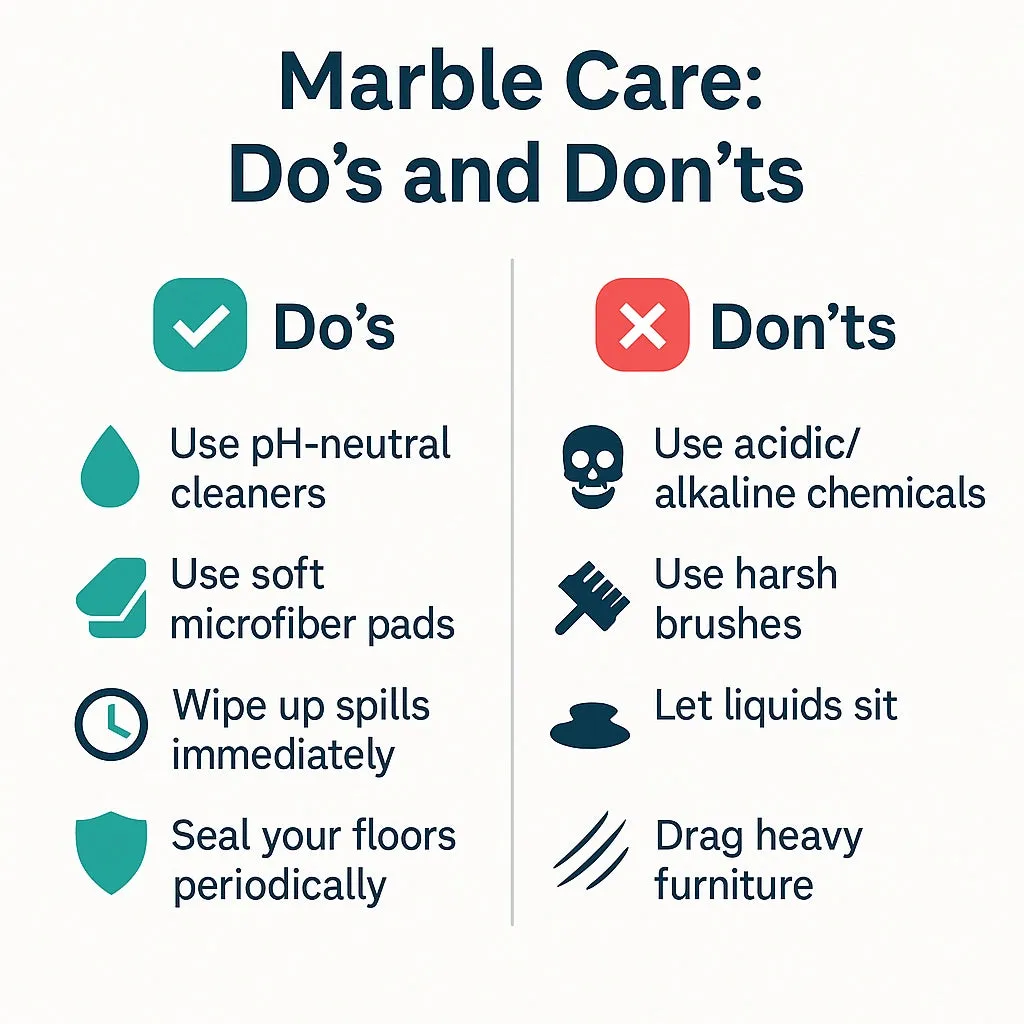
Marble care is simple when you match method to material. Use pH-neutral cleaners for daily wipe-downs, seal porous zones on a sensible schedule, and treat stains by type with a poultice. Fix etching with light polish or pro help. Keep corners flexible with silicone in wet rooms.
You will find quick answers first, then deeper notes. Keep this playbook near the sink, and your stone will keep its calm look longer.
Know Your Stone: Composition, Porosity, and Finish
Many problems start with the material itself. Marble is mostly calcium carbonate, which reacts with acids. Its porosity varies by type and finish. Learn these basics before you choose a cleaner or a sealer.
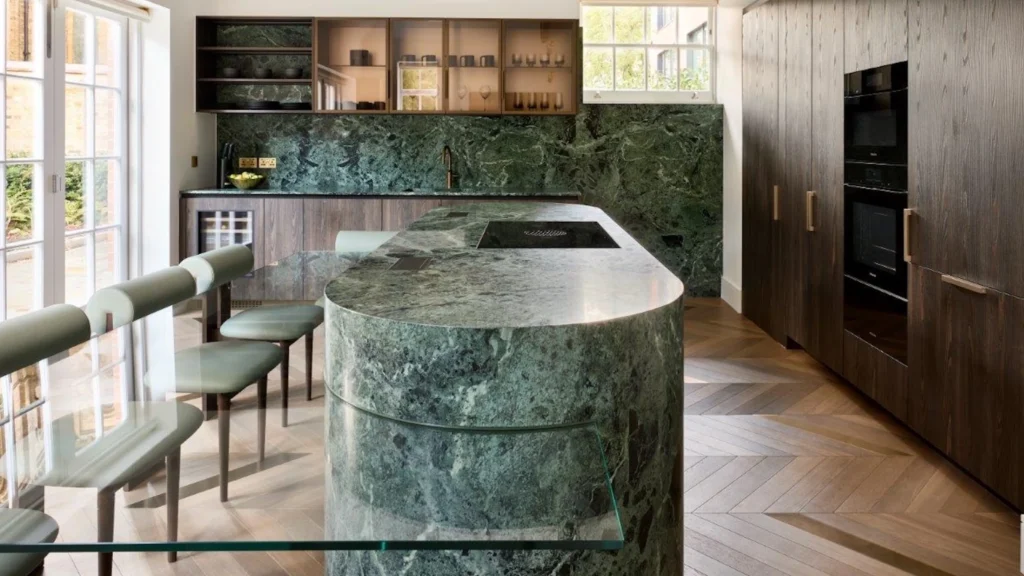
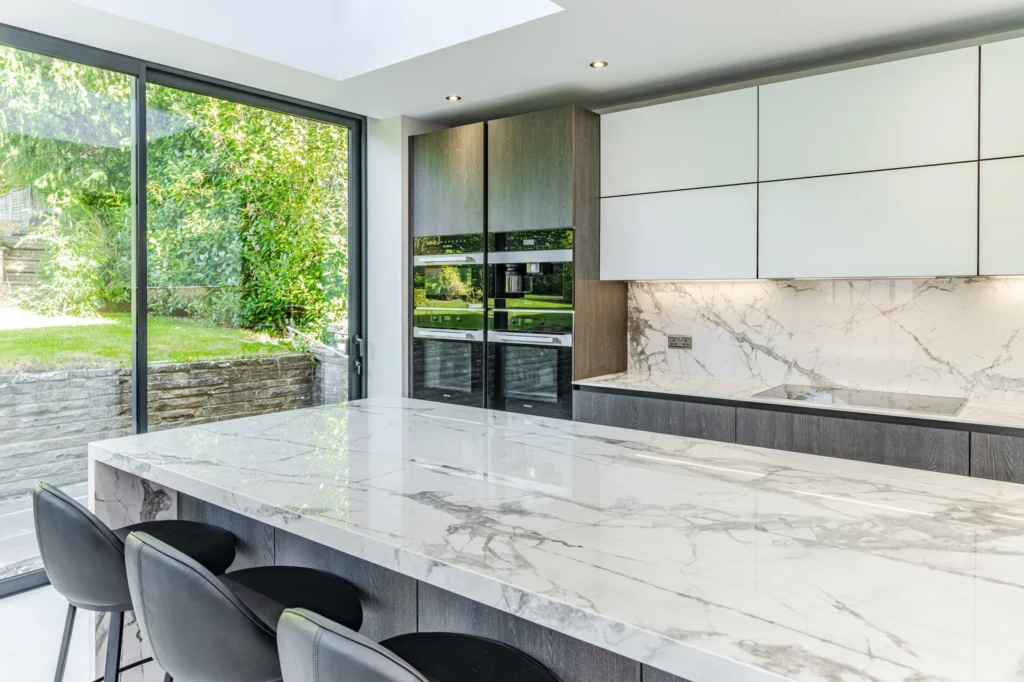
Marble behaves like a sponge and a chalkboard at the same time. Its pores take in liquids; its surface reacts to acid. A honed finish hides tiny marks; a polished finish reflects light but shows etch faster.
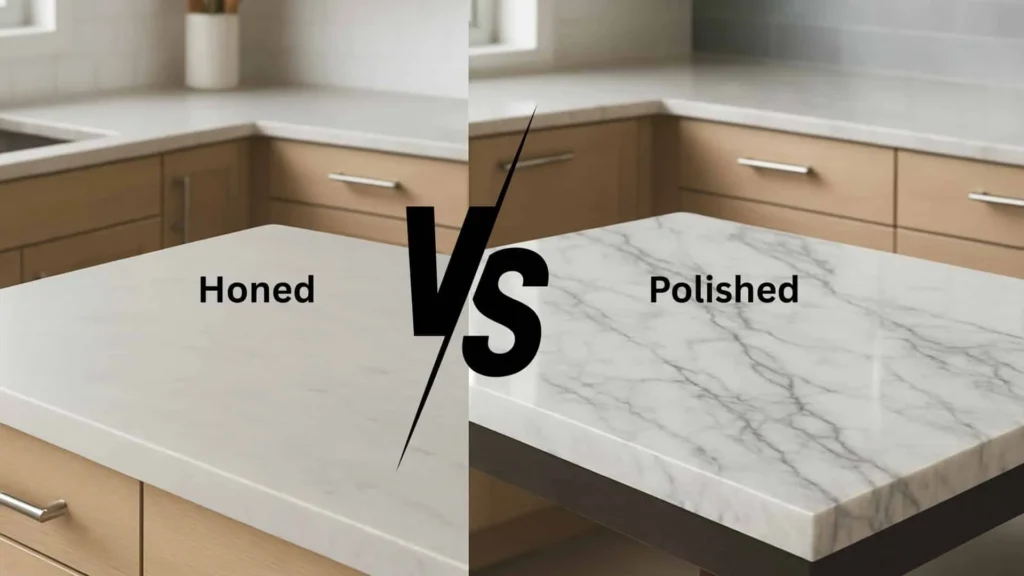
Marble is a natural stone rich in calcium carbonate. That is why lemon juice, vinegar, and many bathroom cleaners leave dull spots called “etch marks.” These are not stains; they are microscopic surface changes. Porosity also matters. Dense marbles take in less liquid; open-pored stones take in more. A polished surface scatters less light, so small scratches and etches show up sooner. A honed surface is matte and more forgiving day to day. Neither surface is “wrong.” Pick by use and tolerance for maintenance. In high-splash kitchens, choose patterns that mask minor marks. In showers, plan stronger ventilation and fast squeegee. Edges and seams need extra care because liquid collects there. If you already installed the stone, you can still test behavior. Place a few drops of water on a hidden spot. If the dark ring remains after ten minutes, plan to seal. If it lifts at once, your stone is dense or already sealed. Knowing the base behavior will guide every choice later: cleaner, sealer, and repair method.
Finish and Absorption at a Glance
| Finish | Look | Hides Marks | Absorption Tendency |
| Polished | Gloss, sharp reflection | Low | Lower (but etch more visible) |
| Honed | Matte, soft reflection | High | Moderate |
| Leathered/Brushed | Textured, tactile | High | Varies by stone |
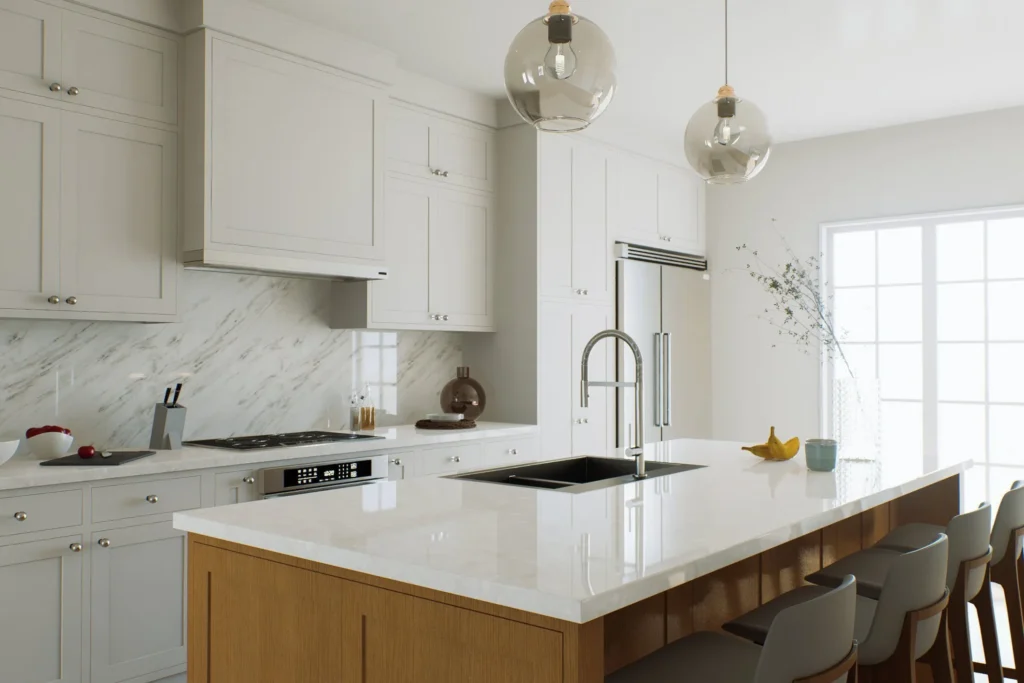
Daily Cleaning That Protects, Not Damages
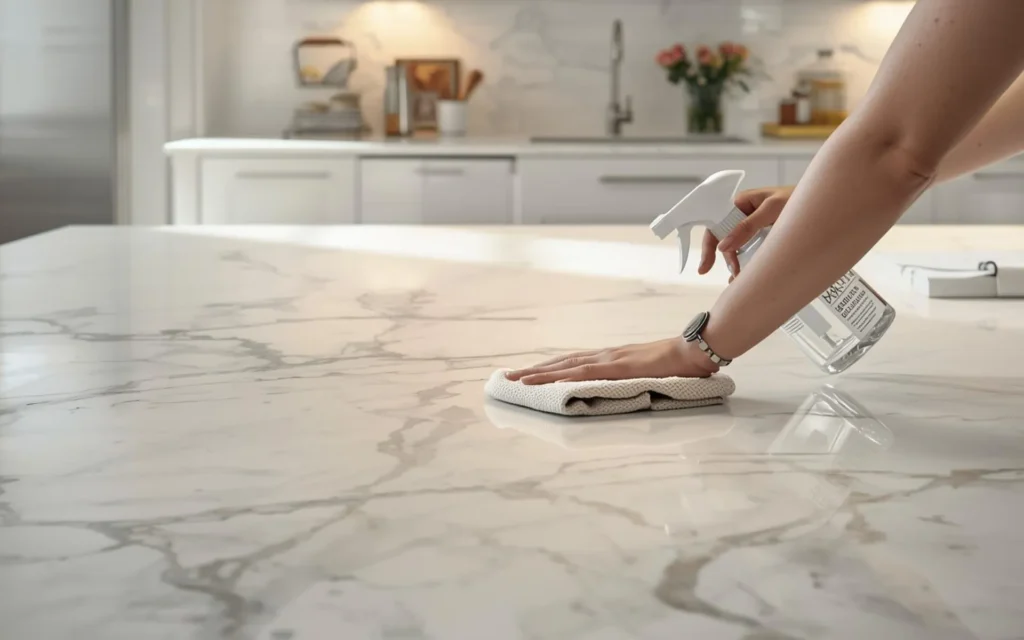
Everyday mess is fine. The wrong cleaner is not. Keep it simple: soft cloth, warm water, and a mild, pH-neutral soap. Dry to avoid rings and mineral film.
Daily care sets the tone for long life. Gentle tools keep the sealer intact and the surface bright. Harsh agents work fast but cost you the finish.
Think in three moves: lift, rinse, dry. Use microfiber to lift crumbs and dust so grit does not abrade the surface. Use warm water and a mild, PH-neutral cleaner for oils or sticky spots. Wipe again with clean water. Then dry with a dry microfiber cloth. Drying is not just for looks. It prevents mineral spots from tap water and slows mildew growth in damp rooms. Skip vinegar, citrus, glass cleaner with ammonia, and powdered abrasives. Skip “magic” eraser pads on polished stone; they are micro-abrasives. Save them for sinks and grout. Handle heat marks and cookware carefully. Use trivets under hot pans to avoid thermal shock at weak seams. Use coasters under glasses with citrus drinks or wine. These small habits cost little and prevent hours of repair. For bathroom walls, adopt a “wipe right away” rule after showers. A quick squeegee takes under a minute and removes most water before it can deposit minerals.
Safe Daily Kit
| Item | Why It Helps | Notes |
| Microfiber cloths | Lift dust and film | Keep separate cloths for clean/dry |
| pH-neutral liquid soap | Cuts grease without etch | A few drops per liter of water |
| Spray bottle (water) | Quick rinse | Label to avoid mix-ups |
| Squeegee | Removes water fast | Best for showers and backsplashes |
Stain Identification and Poultice That Actually Works
Stains do not all behave the same. Oil spreads and darkens. Organic spills leave color. Metal leaves rust. Choose your poultice by stain type so the chemistry does the hard work.
The right poultice lifts color out of pores. Guessing wastes time. Identify the source first, then pick the powder and the liquid that target it.
Start with a simple ID. Oil stains look darker and spread slowly. Organic stains from coffee, tea, or wine leave tan or brown color. Rust leaves orange or brown from metal cans or steel wool. Ink and dye leave sharp color. Once you know the source, build the poultice: a clean white powder (like kaolin, talc, or baking soda) mixed with a target liquid. Spread a paste about 3–5 mm thick, overlap the stained area by 1–2 cm, cover with plastic, and tape the edges. After 24–48 hours, remove the plastic and let the poultice dry fully. Then lift and wipe. Repeat if needed. Test first on a hidden spot to confirm it does not lighten the surrounding stone. Do not rush drying; the slow pull draws the stain out. Some stains need multiple rounds. For iron rust, use a rust remover made for natural stone. For oil, start with baking soda and water. For organics, hydrogen peroxide at a low strength works. For ink, isopropyl alcohol can help on light stones. Always rinse and dry after the lift so residue does not re-soil the area. If the “stain” is a dull light mark, it may be an etch, not a stain; see the next section. For background on the poultice idea, see poultice.
Stain Type → Poultice Guide
| Stain Type | First Try | Why It Works |
| Oil/Grease | Baking soda + water | Absorbs oil, mild and safe |
| Organic (coffee, wine) | Talc + low-strength hydrogen peroxide | Oxidizes color |
| Rust (iron) | Talc + stone-safe rust remover | Reduces iron stains |
| Ink/Dye | Talc + isopropyl alcohol | Solvent lifts colorants |
Etching vs. Staining: Tell and Fix
A stain sinks in. An etch changes the top surface. Treat them differently. Polish handles etches; poultice handles stains. Mixing methods wastes time.
You can spot an etch by feel and light. It looks dull and feels smooth. It often shows where acid or strong cleaner sat.
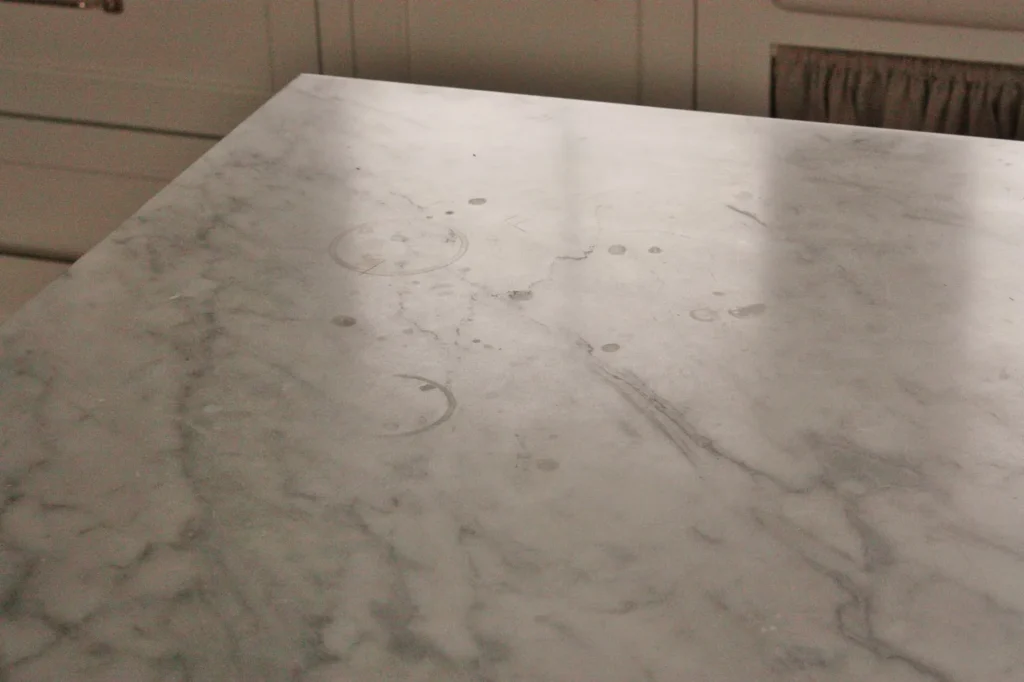
Do a quick test. Put a drop of water on the mark. If the color deepens and stays dark, you likely have a stain. If color does not change but the area stays dull, you likely have an etch. Small etches on polished marble can improve with a very fine polishing compound or a 0000-grade steel wool pad used with care. Always test in an inconspicuous spot first. For honed marble, you can often blend light etches with a non-waxy honing powder. Large or deep etches call for a pro who can re-hone and re-polish with pads. Combine this with better habits so the marks do not return. Keep acids away: lemon, vinegar, wine, and many bathroom cleaners. Teach everyone in the house the “wipe and dry” habit. If an etch and a stain overlap, treat the stain first with a poultice, then address the etch with polishing. Avoid “sealer as cure.” Sealers help with stains, not with etch. If you see faint rings near sink faucets, check aerators for spray drift. Replace worn gaskets. These tiny details cut new etches by a lot.
Quick Decision Tree
| Symptom | Likely Issue | First Response |
| Dark mark, texture unchanged | Stain | Match poultice to source |
| Light, dull mark, smooth texture | Etch | Test gentle polish on hidden spot |
| Both dull and dark | Mix of both | Poultice first, then polish |
Sealing Strategy: When, What, and How
Sealer is not a shield against every spill. It slows absorption so you can wipe in time. Choose a penetrating sealer. Apply on a clean, dry surface. Wipe excess before it cures.
Plan a schedule that fits your stone and traffic. More is not always better. Test water beads to decide when to re-seal.
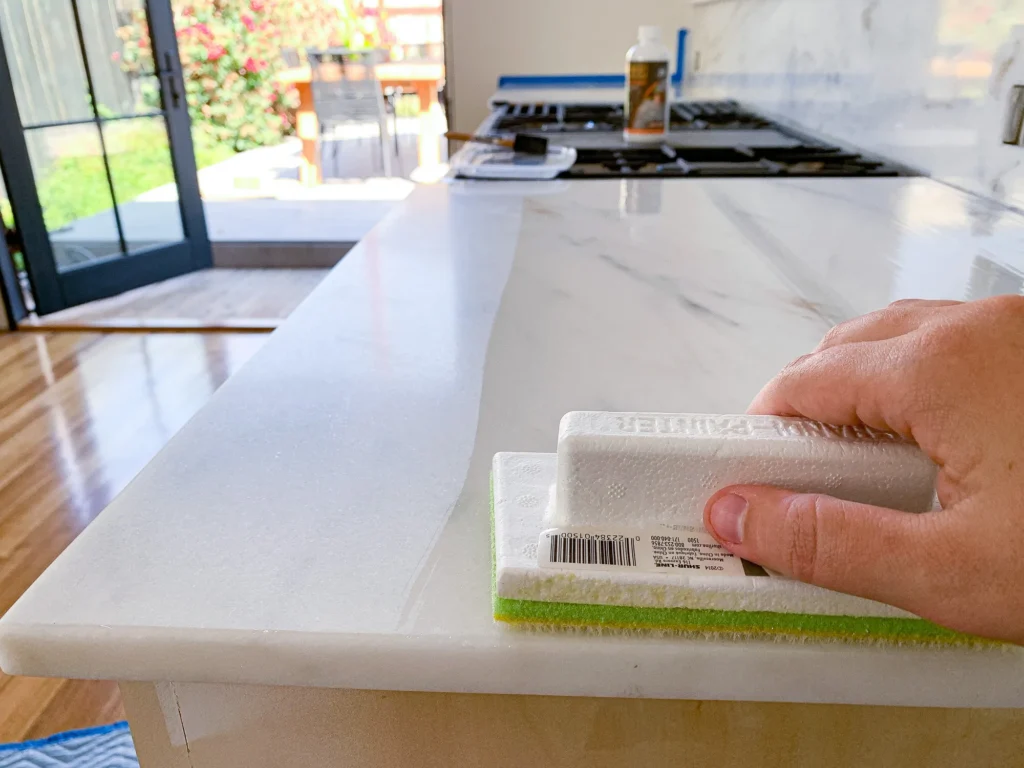
Most modern sealers are penetrating formulas. They travel into pores and reduce how fast liquids enter. They do not form a thick film on top. That is good, because films can peel or trap haze. Before sealing, deep-clean the surface and let it dry fully. Tape edges if you need clean lines. Apply in small sections. Wait the time on the label, then wipe all residue until the surface looks even and dry. Do not let sealer puddle or “dry on top.” That causes streaks. Ventilate well. Keep off the surface while it cures. In showers, wait longer before full water exposure. To check if you need to re-seal, place a few water drops. If dark rings linger after ten minutes, it is time. If they vanish quickly, you can wait. High-use kitchen islands and busy entries need more frequent checks. Lower-use vanities can go longer. Some very dense stones need little or no sealer at all. Always test first, since over-sealing can leave residue. Keep a maintenance log so you know what you did and when.
Simple Re-Seal Planner
| Area | Typical Use | Check Interval | Re-Seal If… |
| Kitchen counters | Daily prep, spills | Every 3–6 months | Water rings linger after 10 min |
| Bathroom vanity | Light water, cosmetics | Every 6–12 months | Makeup leaves shadows |
| Shower walls | Heavy water | Every 6–12 months | Damp patches remain after squeegee |
| Entry floors | Grit, shoes | Every 6 months | Dark tracks form in traffic lanes |
Floors, High-Traffic Zones, and Sand Control
Foot traffic brings grit. Grit makes micro-scratches. Micro-scratches dull the floor. Control grit at the door. Clean with neutral products. Dry fast to avoid mineral film.
Floor care is about prevention as much as cleaning. Keep dirt out, and mopping gets easier. Skip harsh tools that cut the finish.
Start with a strong entrance routine. Place a good doormat outside and inside. Add a runner if the hall is long. Vacuum with a brush attachment or dust mop daily in high-traffic areas. This removes grit that acts like sandpaper. Mop with warm water and a pH-neutral cleaner once or twice a week, depending on traffic. Wring the mop well to avoid pooling water. Dry with a clean towel or let airflow help if the room is warm and dry. Avoid steam mops; heat and moisture under pressure can open pores and degrade sealer at joints. For furniture, add felt pads and check them often. Chairs scratch marble less when felt pads are fresh and clean. In kitchens, think about workflow zones. Place mats near sinks and cooktops where splashes and crumbs are common. In bathrooms, keep a squeegee near the shower and use it after each use. That step costs seconds and saves hours over a year. If you notice dull tracks, try a light polish designed for floors or call a pro to re-hone. Do not try metal pads or aggressive grits yourself. The risk of lipping and wave lines is high.
Floor Routine
| Task | Frequency | Notes |
| Dust mop or vacuum | Daily in busy zones | Use brush head; avoid hard wheels |
| Damp mop (neutral cleaner) | 1–2× per week | Wring well; dry fast |
| Spot clean spills | Right away | Blot, rinse, dry |
| Re-seal check | Every 6 months | Water drop test |
Wet Areas: Bathrooms, Showers, and Backsplashes
Water sits. Soap builds film. Minerals leave spots. In wet rooms, speed matters. Squeegee now, clean light later, and keep movement joints flexible with silicone.
Design small habits around daily use. These cut mold and stains without harsh chemicals that can etch or dull.

After each shower, do two quick things: squeegee the walls and wipe hardware. This removes most water and prevents mineral deposits. Use a pH-neutral cleaner once or twice a week. For soap film, try a mild stone-safe film remover as needed. Ventilation is as important as cleaning. Run the fan and keep a door open after use so vapor leaves the room. At every change of plane—wall to floor, inside corners, around tubs—use silicone, not rigid grout. Silicone flexes as the house moves or as walls swell with moisture. Inspect these lines twice a year and touch up as needed. Avoid bleach on stone; it can lighten surfaces and degrade sealers. For mildew, rely on improved drying, better airflow, and gentle cleaners made for stone. On backsplashes behind cooktops, wipe splatter right away. Oil and acid from food can stain or etch. Use a small tray for oils and vinegars so bottles do not mark the stone. Keep a microfiber towel in a drawer for quick grabs. Small, fast actions beat rare, heavy scrubbing every time.
Wet-Zone Do/Don’t
| Do | Why | Don’t | Why |
| Squeegee after use | Removes water/minerals | Use vinegar sprays | Acid etches marble |
| Use silicone at corners | Allows movement | Grout plane changes | Cracks and leaks |
| Ventilate well | Cuts mildew | Seal a wet surface | Traps moisture |
What to Avoid and Why It Matters
Shortcuts save minutes and cost finish. Skip acids, abrasives, and random tools from the grocery aisle. Your stone is strong, but the finish is delicate.
Know the danger list. Share it with everyone who cleans the house. One wrong spray can undo months of good care.
Avoid products with acid (like vinegar or citrus) because marble’s calcium carbonate reacts and leaves etch. Avoid ammonia and high-pH degreasers on polished marble; they can dull the shine. Skip powdered cleansers and hard pads; they scratch. Be careful with “all-purpose” bathroom sprays; many are acid-based. Skip steam mops on floors; heat and pressure can widen pores and push water into weak seams. Avoid colored cleaners that can stain light stone. Skip “polish in a can” that leaves wax; this attracts dust and can create smear lines. Read labels every time. If the label does not say “stone safe,” do not use it on marble. Keep separate cleaning kits for stone and for everything else. It helps avoid “grab the wrong bottle” accidents. Train guests who help in the kitchen with a two-line rule: “Use this clear spray and this cloth, then dry.” Small systems keep stone looking new with less effort.
Simple Danger Checklist
- Acidic cleaners (including vinegar and citrus sprays)
- Abrasive powders and green scouring pads
- Ammonia glass cleaners on polished stone
- Steam mops on marble floors
- Wax-based polishes that leave sticky films
Conclusion
Marble stays beautiful when you match the method to the material. Clean with pH-neutral products, seal where needed, identify stains, and fix etches the right way. Small habits protect big investments.
Share Your Plan, Get Ideas
Have a project in mind? Send a floor plan and a few photos. We will point out quick wins, plan sealing zones, and propose stain-proof habits that fit your space.